Reduce Low Back Pain With These Simple Techniques
Written by: Michele Lyman, RYT-500

According to WebMD, about 80% of Americans experience a back problem at some point in their lives. And, according to the Journal of American Osteopathic Association, Americans spend $100 billion each year on low back pain alone.
Yikes.
After teaching yoga for 20 years, I can also add that probably in 9 out of 10 classes I teach, at least one person (if not more) will share that they are experiencing low back pain. And, let’s just add that low back pain is no joke! I personally know what it feels like to be stuck on the living room floor, unable to move thanks to back spasms. But the good news is that there is something we can do about it. Today I’m sharing how you can improve or even eliminate your low back pain with awareness, self care and specific yoga postures designed to rebalance your muscles.
Muscle Imbalances
But what does it mean to rebalance your muscles?
Some back pain can definitely be caused by a slipped or herniated disk or other skeletal conditions. But, if you haven’t been diagnosed with something specific, the pain you feel in your lower back is more likely than not because your musculoskeletal system is misaligned or “crooked”, which stems from muscle imbalances in your body.
According to Lee Albert’s book, “Live Pain-Free”, A muscle imbalance:
“... simply means that some muscles are too short and some muscles are too long. Both muscles will feel tight. The short muscle is concentrated and tight, and the long muscle is like an overstretched rubber band - too long and very tight. Since every muscle is attached to a bone, these muscle imbalances pull the bones out of alignment. That’s what makes you crooked.”
When your muscles are imbalanced they become painful, and the joints around these imbalances are compromised which also results in joint pain and limited range of motion.
Unfortunately, our daily lives are usually what causes these imbalances! The way we sit, drive, walk, exercise, stand, etc. are habitual movements that cause us to use some muscles more and other muscles less. The ones we use all the time become shorter and strong and the ones we use less often become long and weak.
For example, consider your upper back during the day. Most likely your shoulders are probably rounded forward as you drive, slump on the couch, look at your phone and work on your computer. This habitual, repetitive position will make your chest muscles short and tight, while the muscles in your upper back become long and weak. Eventually, you might notice upper back pain as the spine and shoulder joints are pushed forward as they adjust to these imbalances.
Thankfully, a technique called “Integrated Positional Therapy” can help! It’s a gentle, self-care approach you can do on your own to get your body back into balance. Basically, you can correct a muscle imbalance by stretching short and strong muscles and strengthening long and weak muscles in order to realign your musculoskeletal system and reduce or eliminate pain!
Poses for Low Back Pain
I don’t have to tell you what low back pain feels like. You probably notice aches, tightness, burning or even sharp, stabbing pains. You might have a hard time moving from one position to another or even experience pain down your leg. Maybe you spend the day standing or sitting improperly. Or maybe you are asked to repeatedly lift heavy objects. Whatever the reason, there are certain poses you can do to help counterbalance all these habitual things you do to your body!
For each pose, you don’t need to go to the fullest range of motion. In fact, these postures are more effective if you only work at about 40-50% of your range. This gives your imbalanced muscles a chance to slowly release and reset back to their aligned position. Overworking your range of motion will cause your muscles to “freak out”, which will just cause them to go back to their imbalanced position.
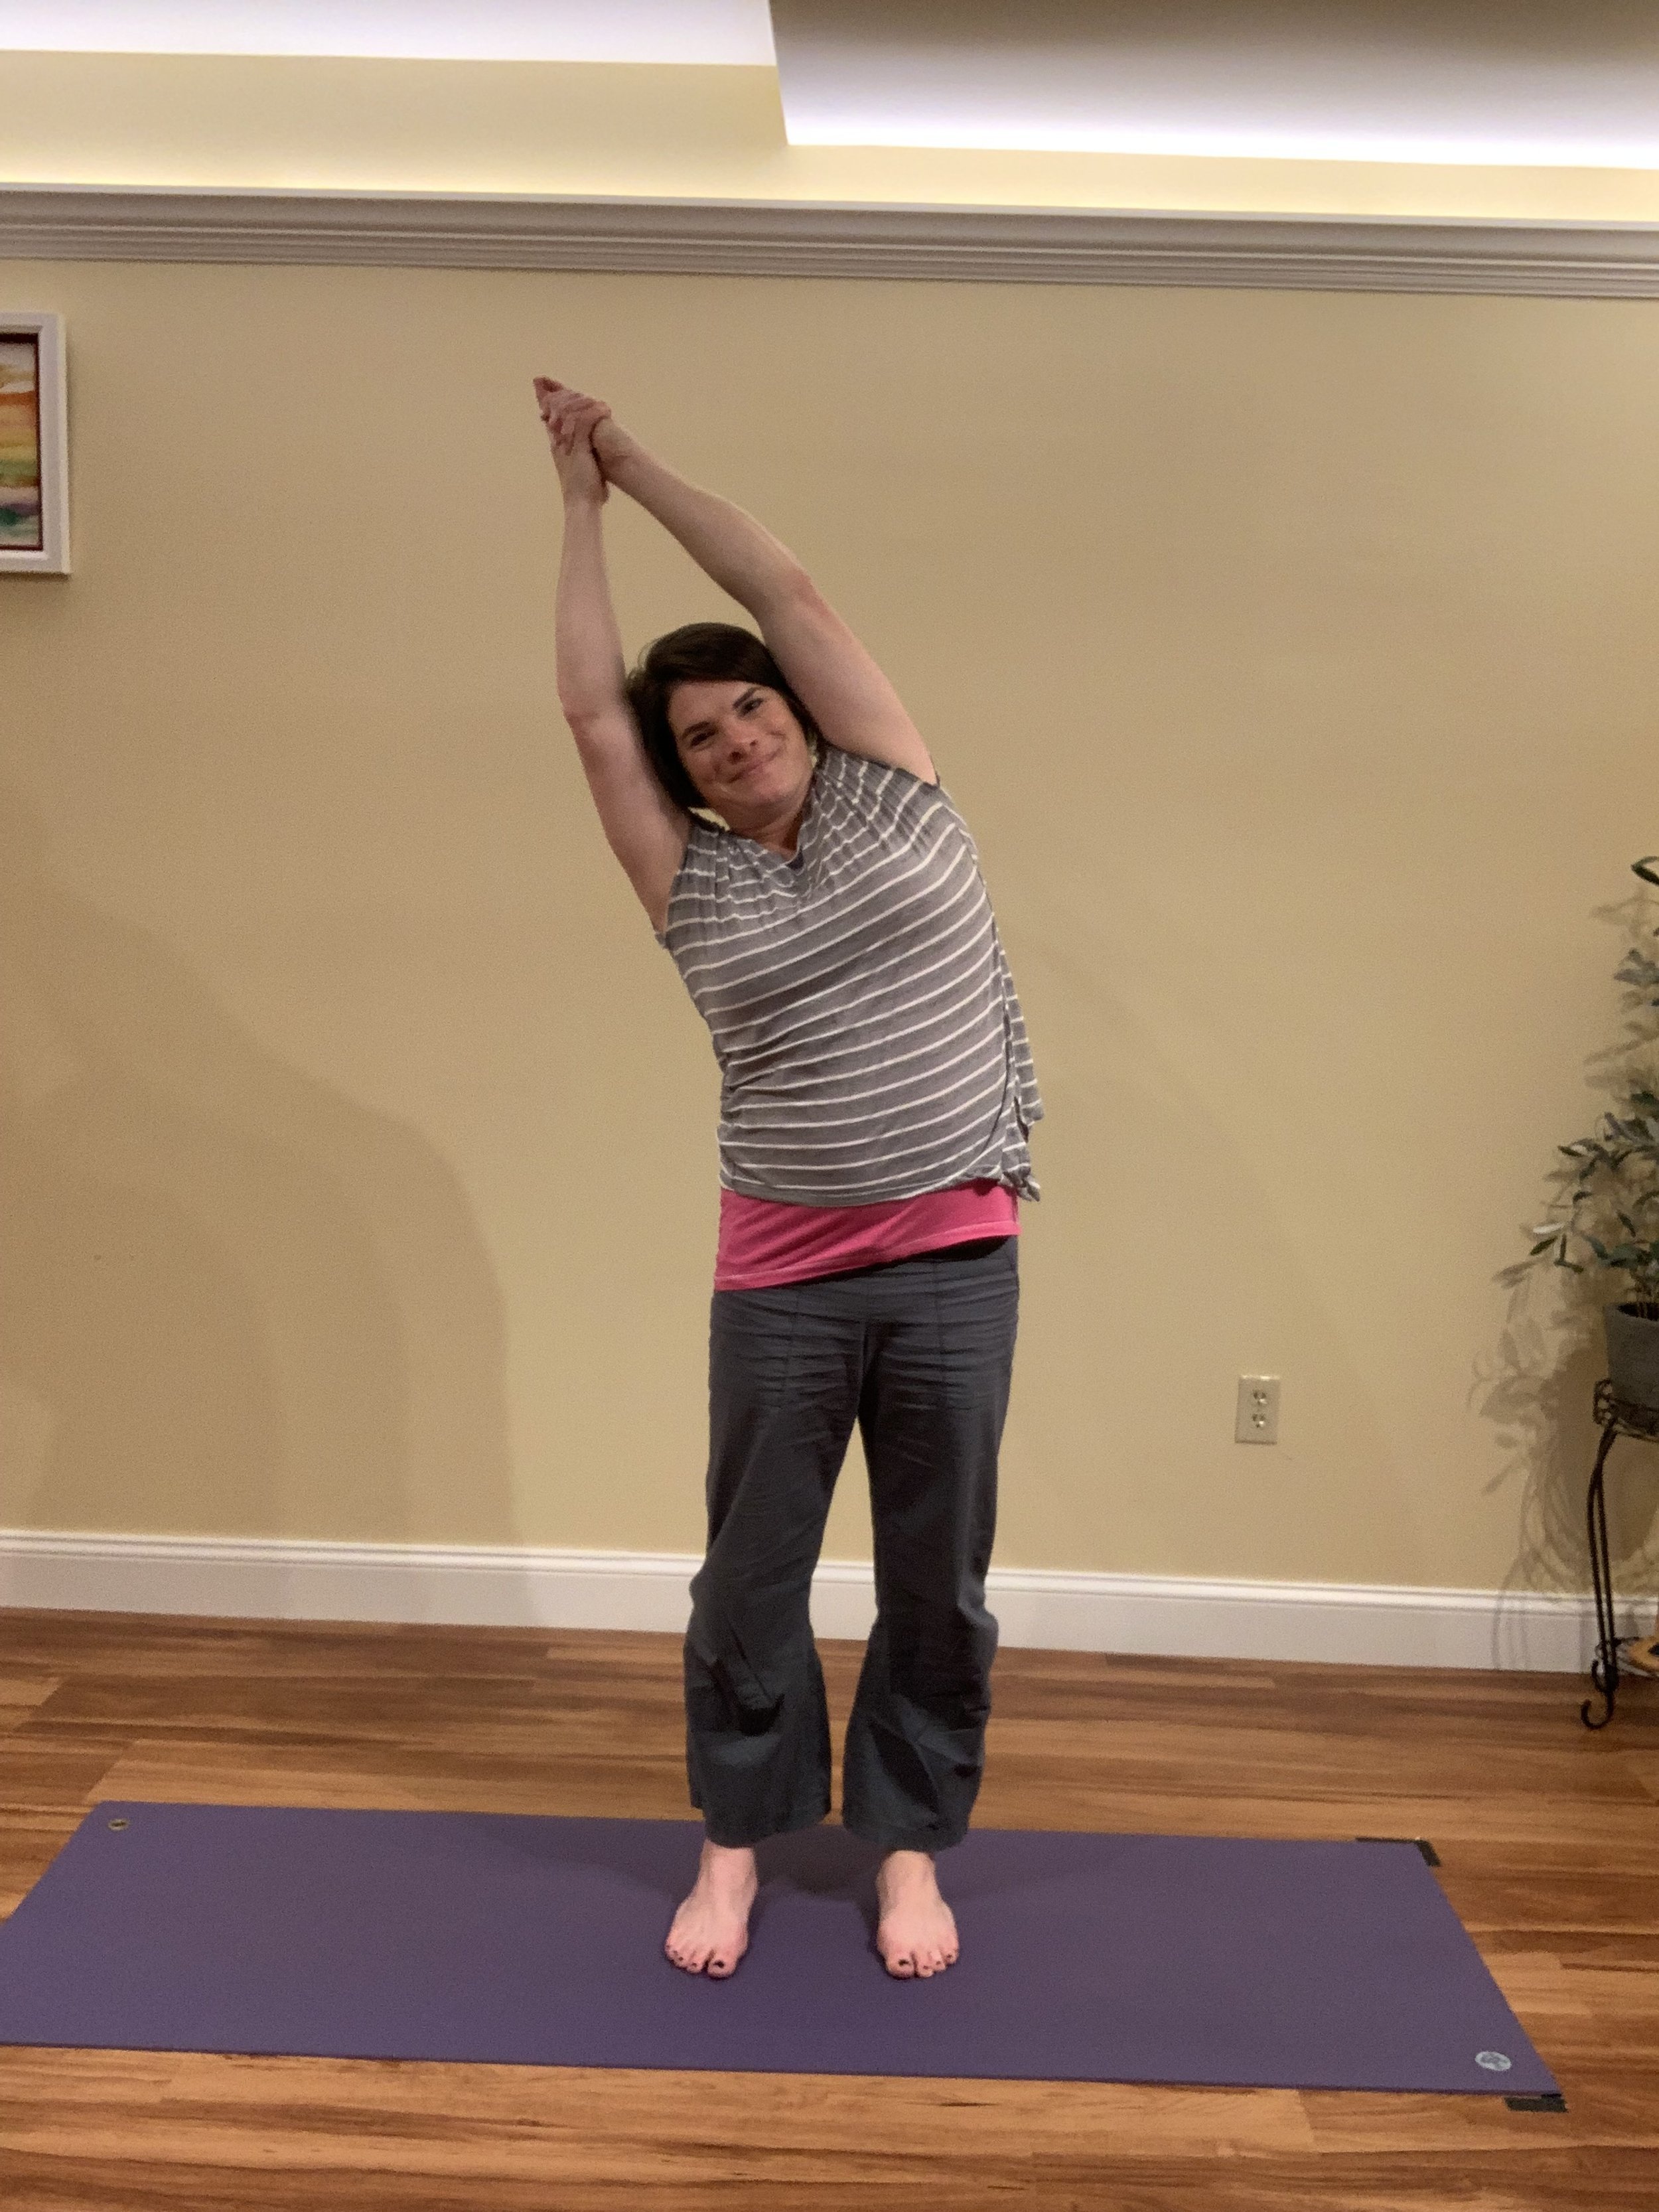

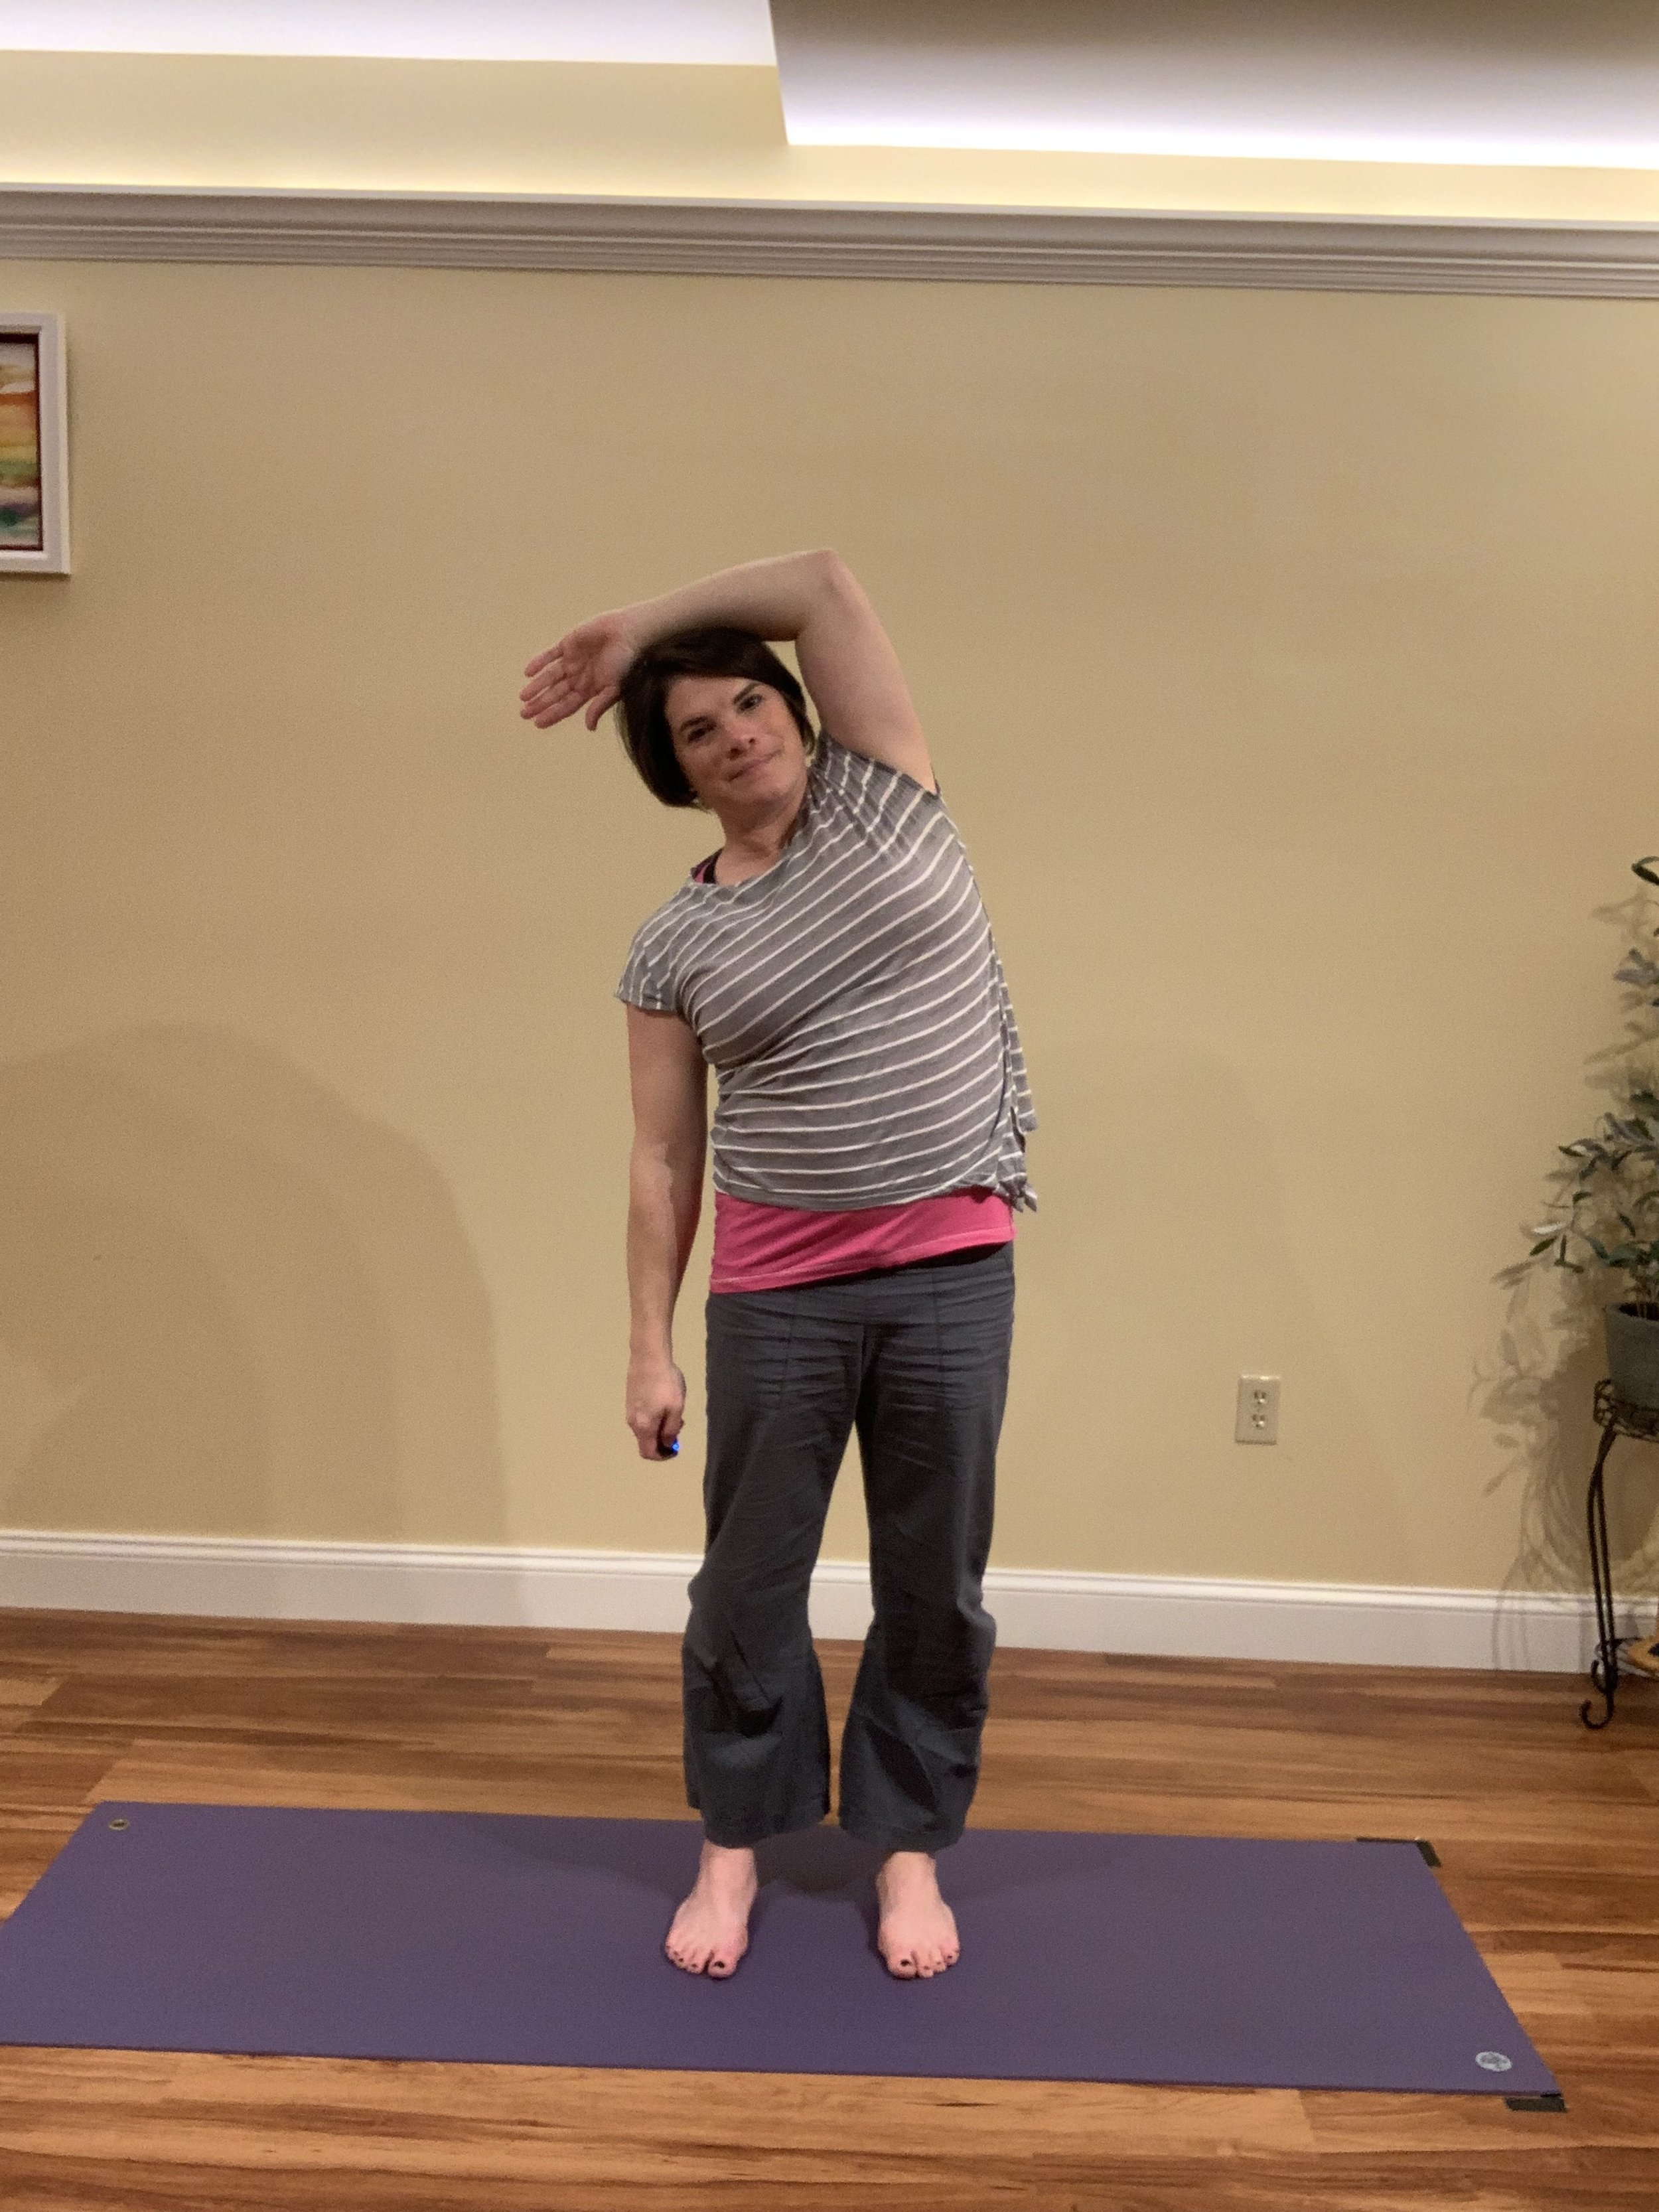
Side Stretch:
Stand with your feet hips distance apart. Inhale your arms over your head and slowly bend to one side until you feel a stretch in the side of your body. Hold for one minutes and repeat on the other side.
Modification: Only lift one arm and rest your forearm on your head as you bend to the opposite side.

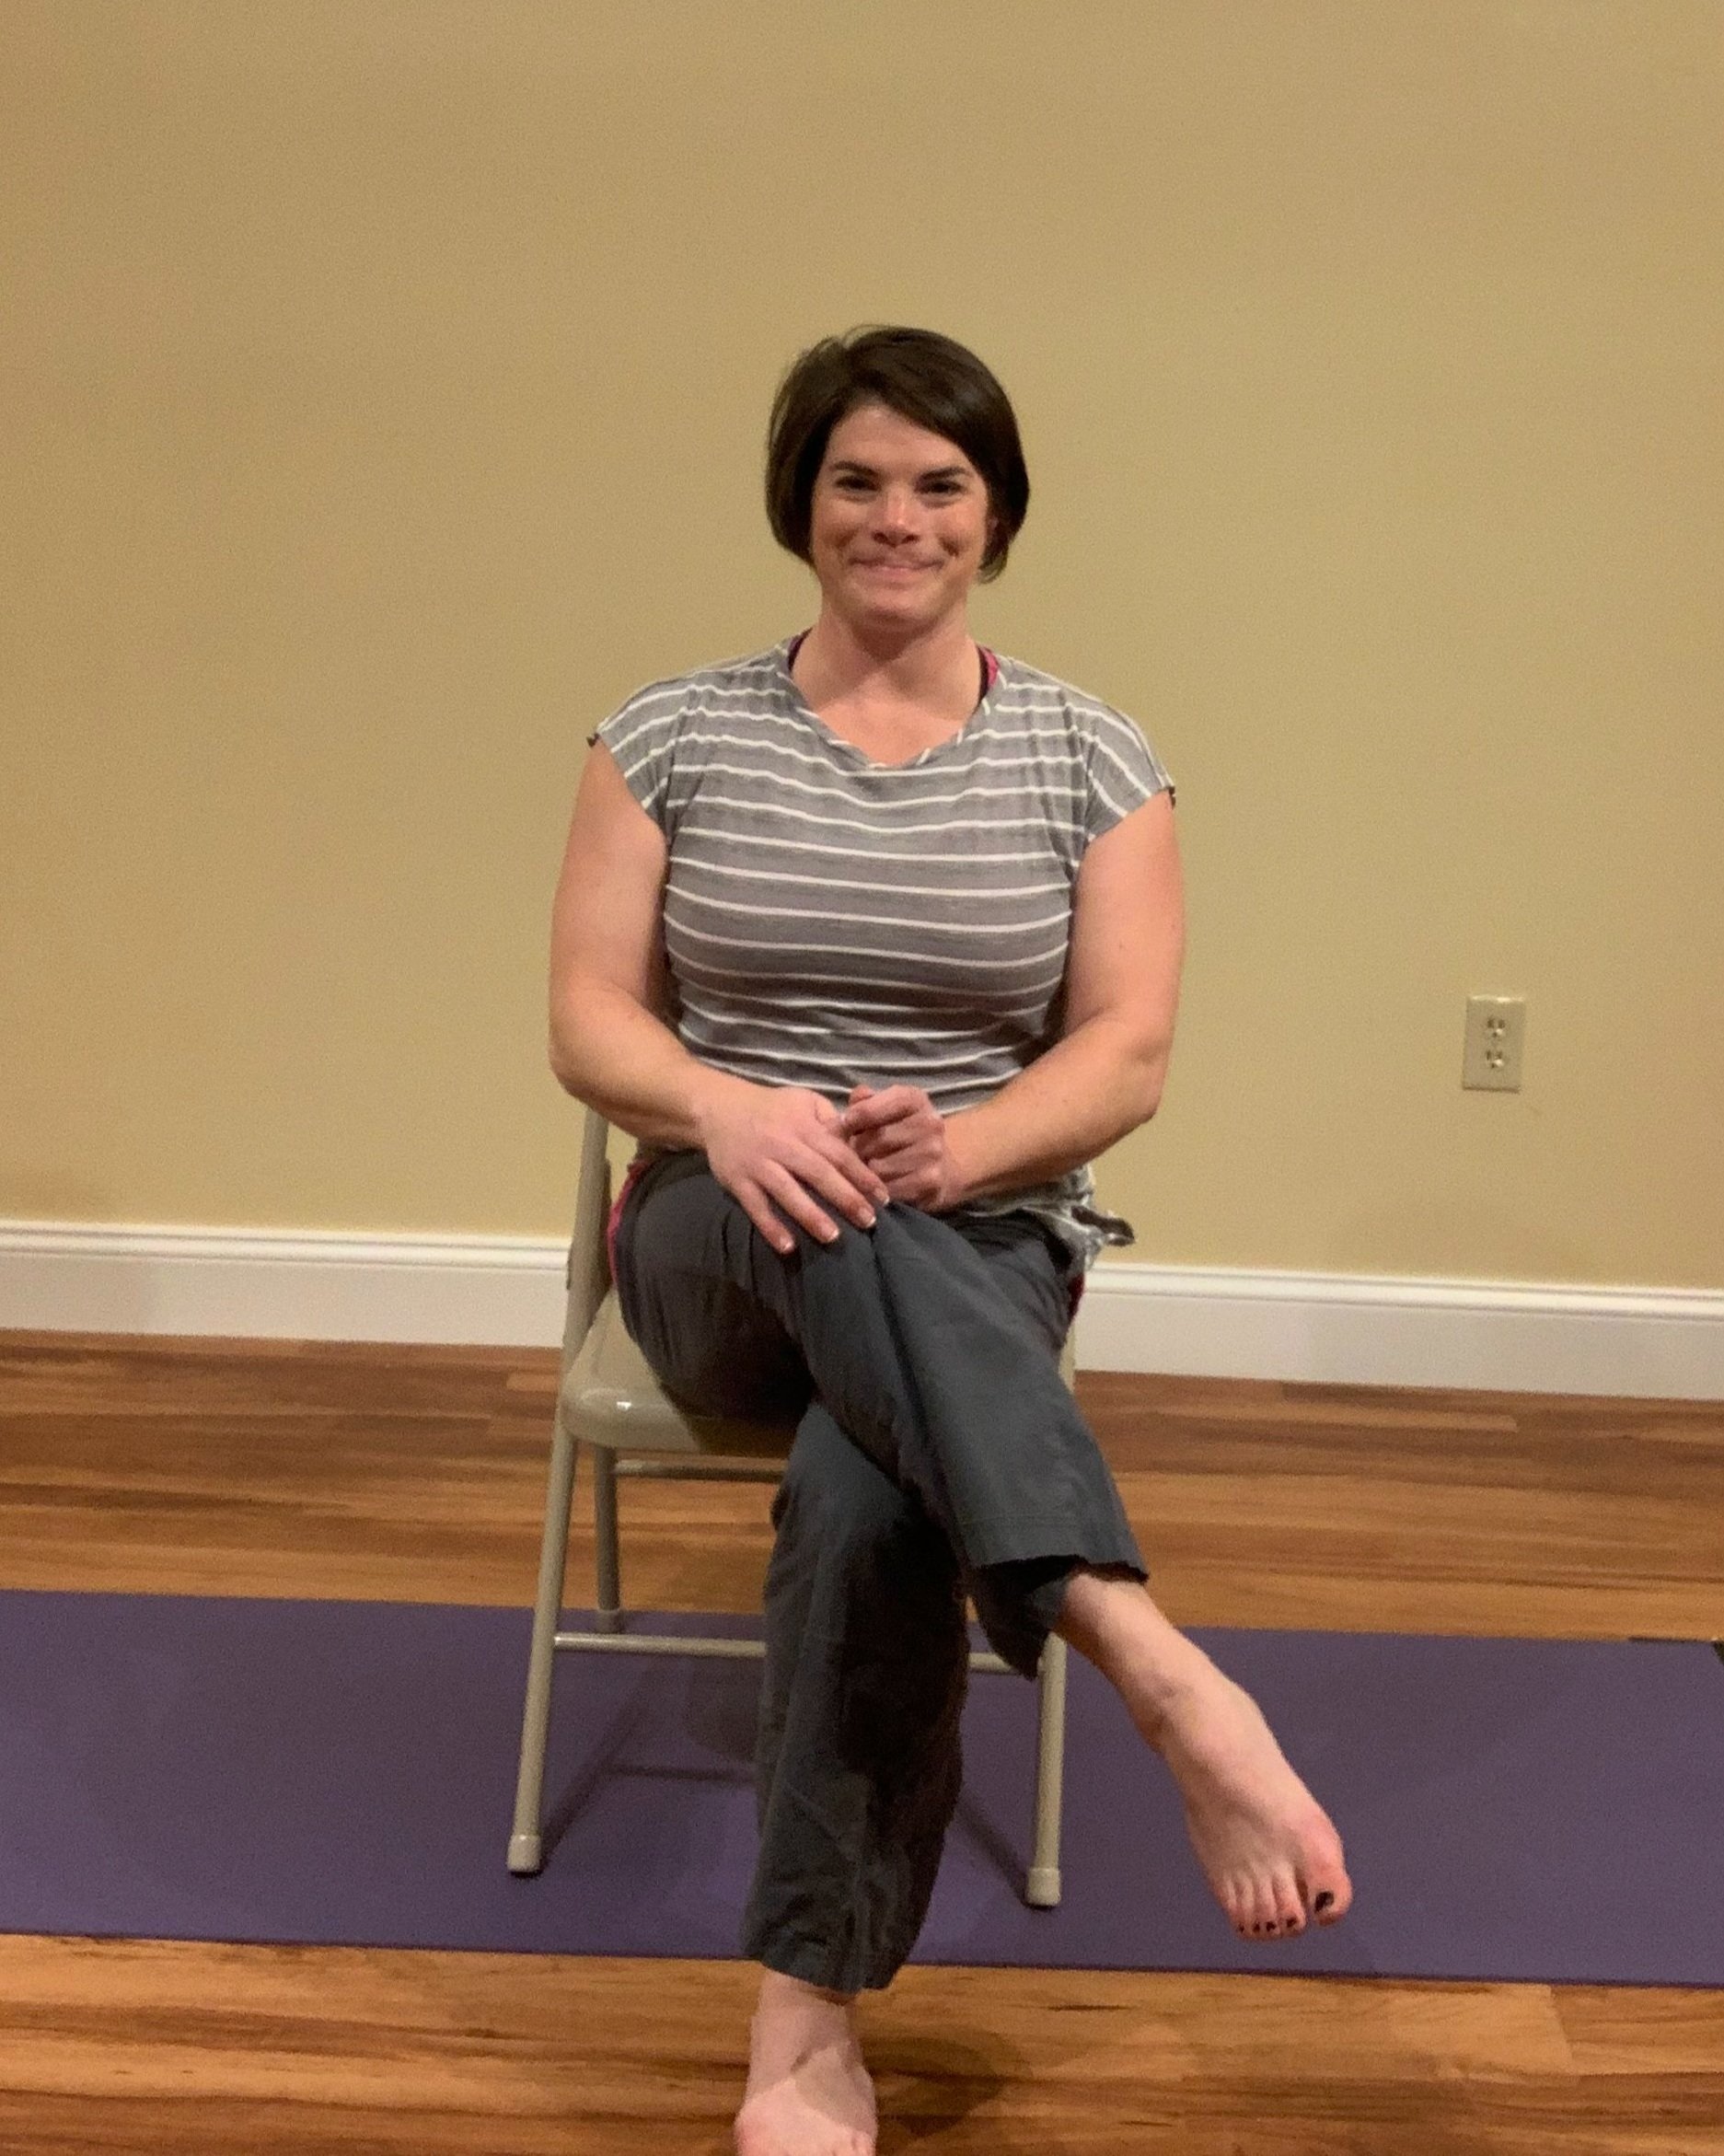
Knee down twist:
Lay on your back and draw your right knee into your chest. Hold it with your left hand and gently draw the knee over to the left. Extend your right arm out from the shoulder. Now, push your right knee up into your left hand and resist with pressure. Hold that pressure for 5 seconds. Release and draw the knee closer to the floor. Hold for one minute and then repeat on the second side.
Modification: Sit in a chair with your right knee crossed over your left. This will gently stretch the outer hip of the upper leg. Switch sides.
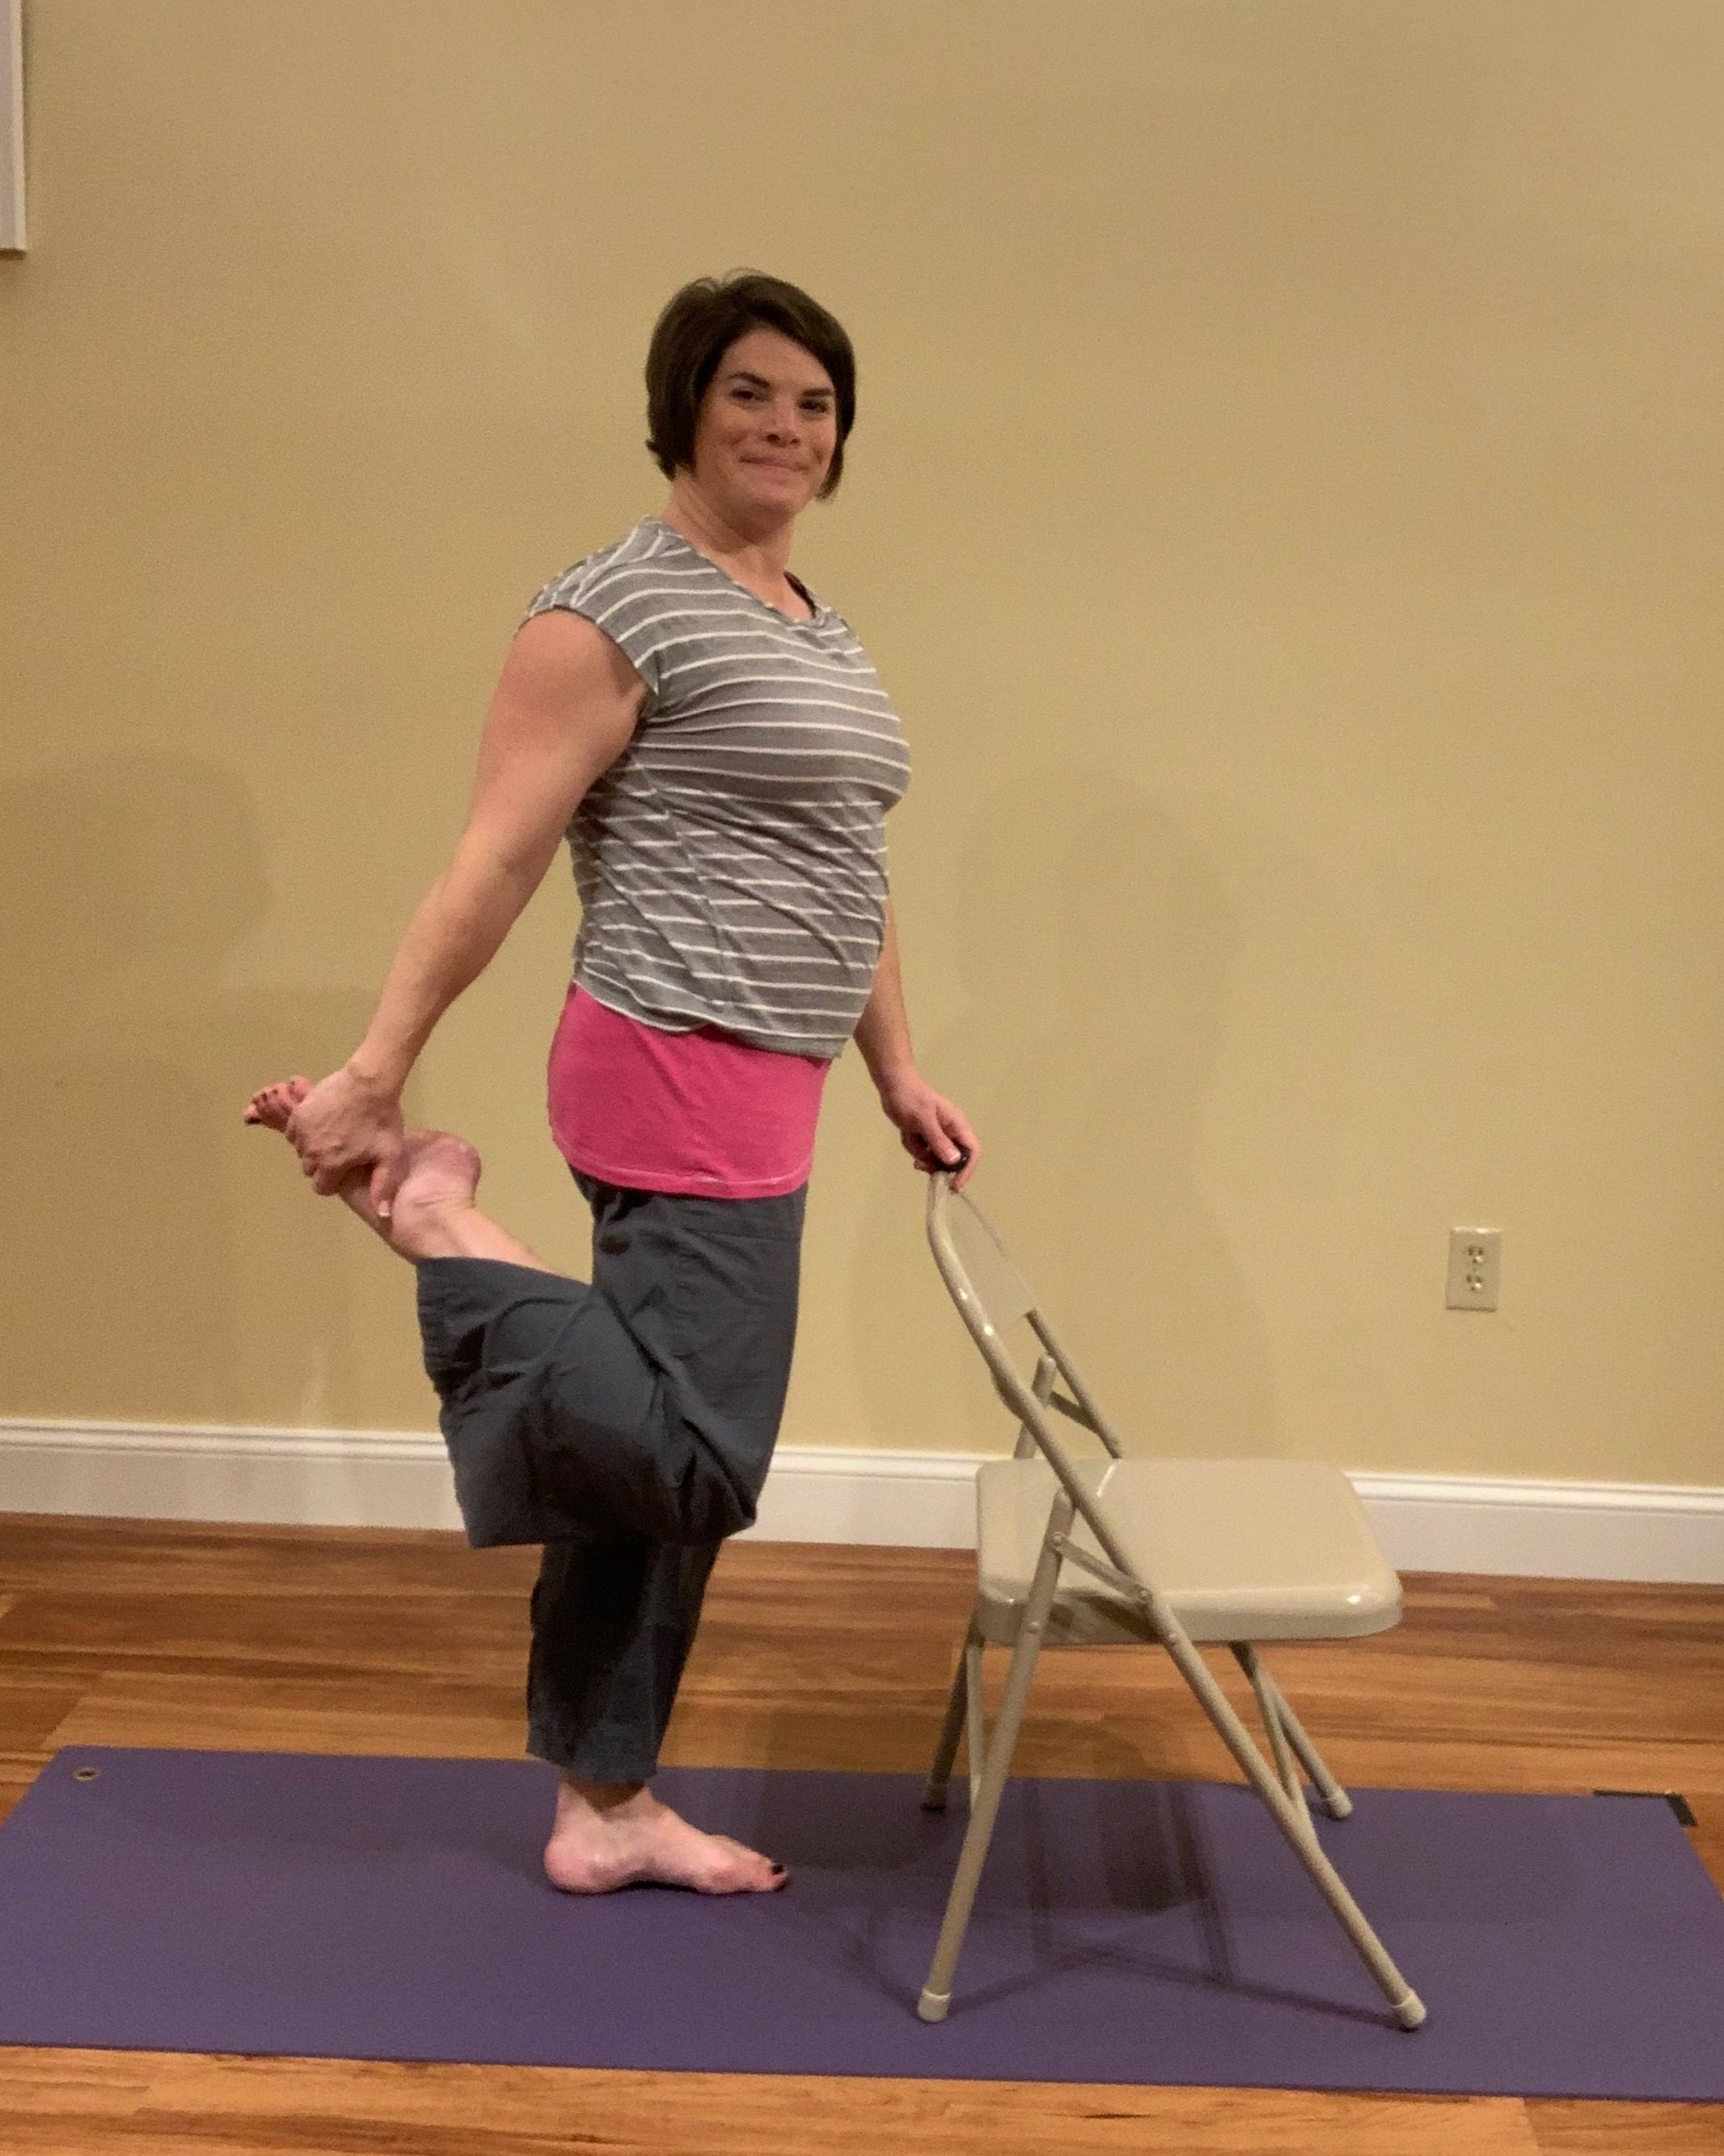
Quadriceps Stretch:
Hold onto the wall or a chair and reach back with the opposite arm to grab the same side’s foot. Feel the stretch in the front of your thigh. Gently push your foot into your hand for 5 seconds and then release. Deepen the stretch and hold for one minute. Repeat on the other side.
Modification: If you can’t reach your foot, no problem! Rest the top of your foot on a chair seat.
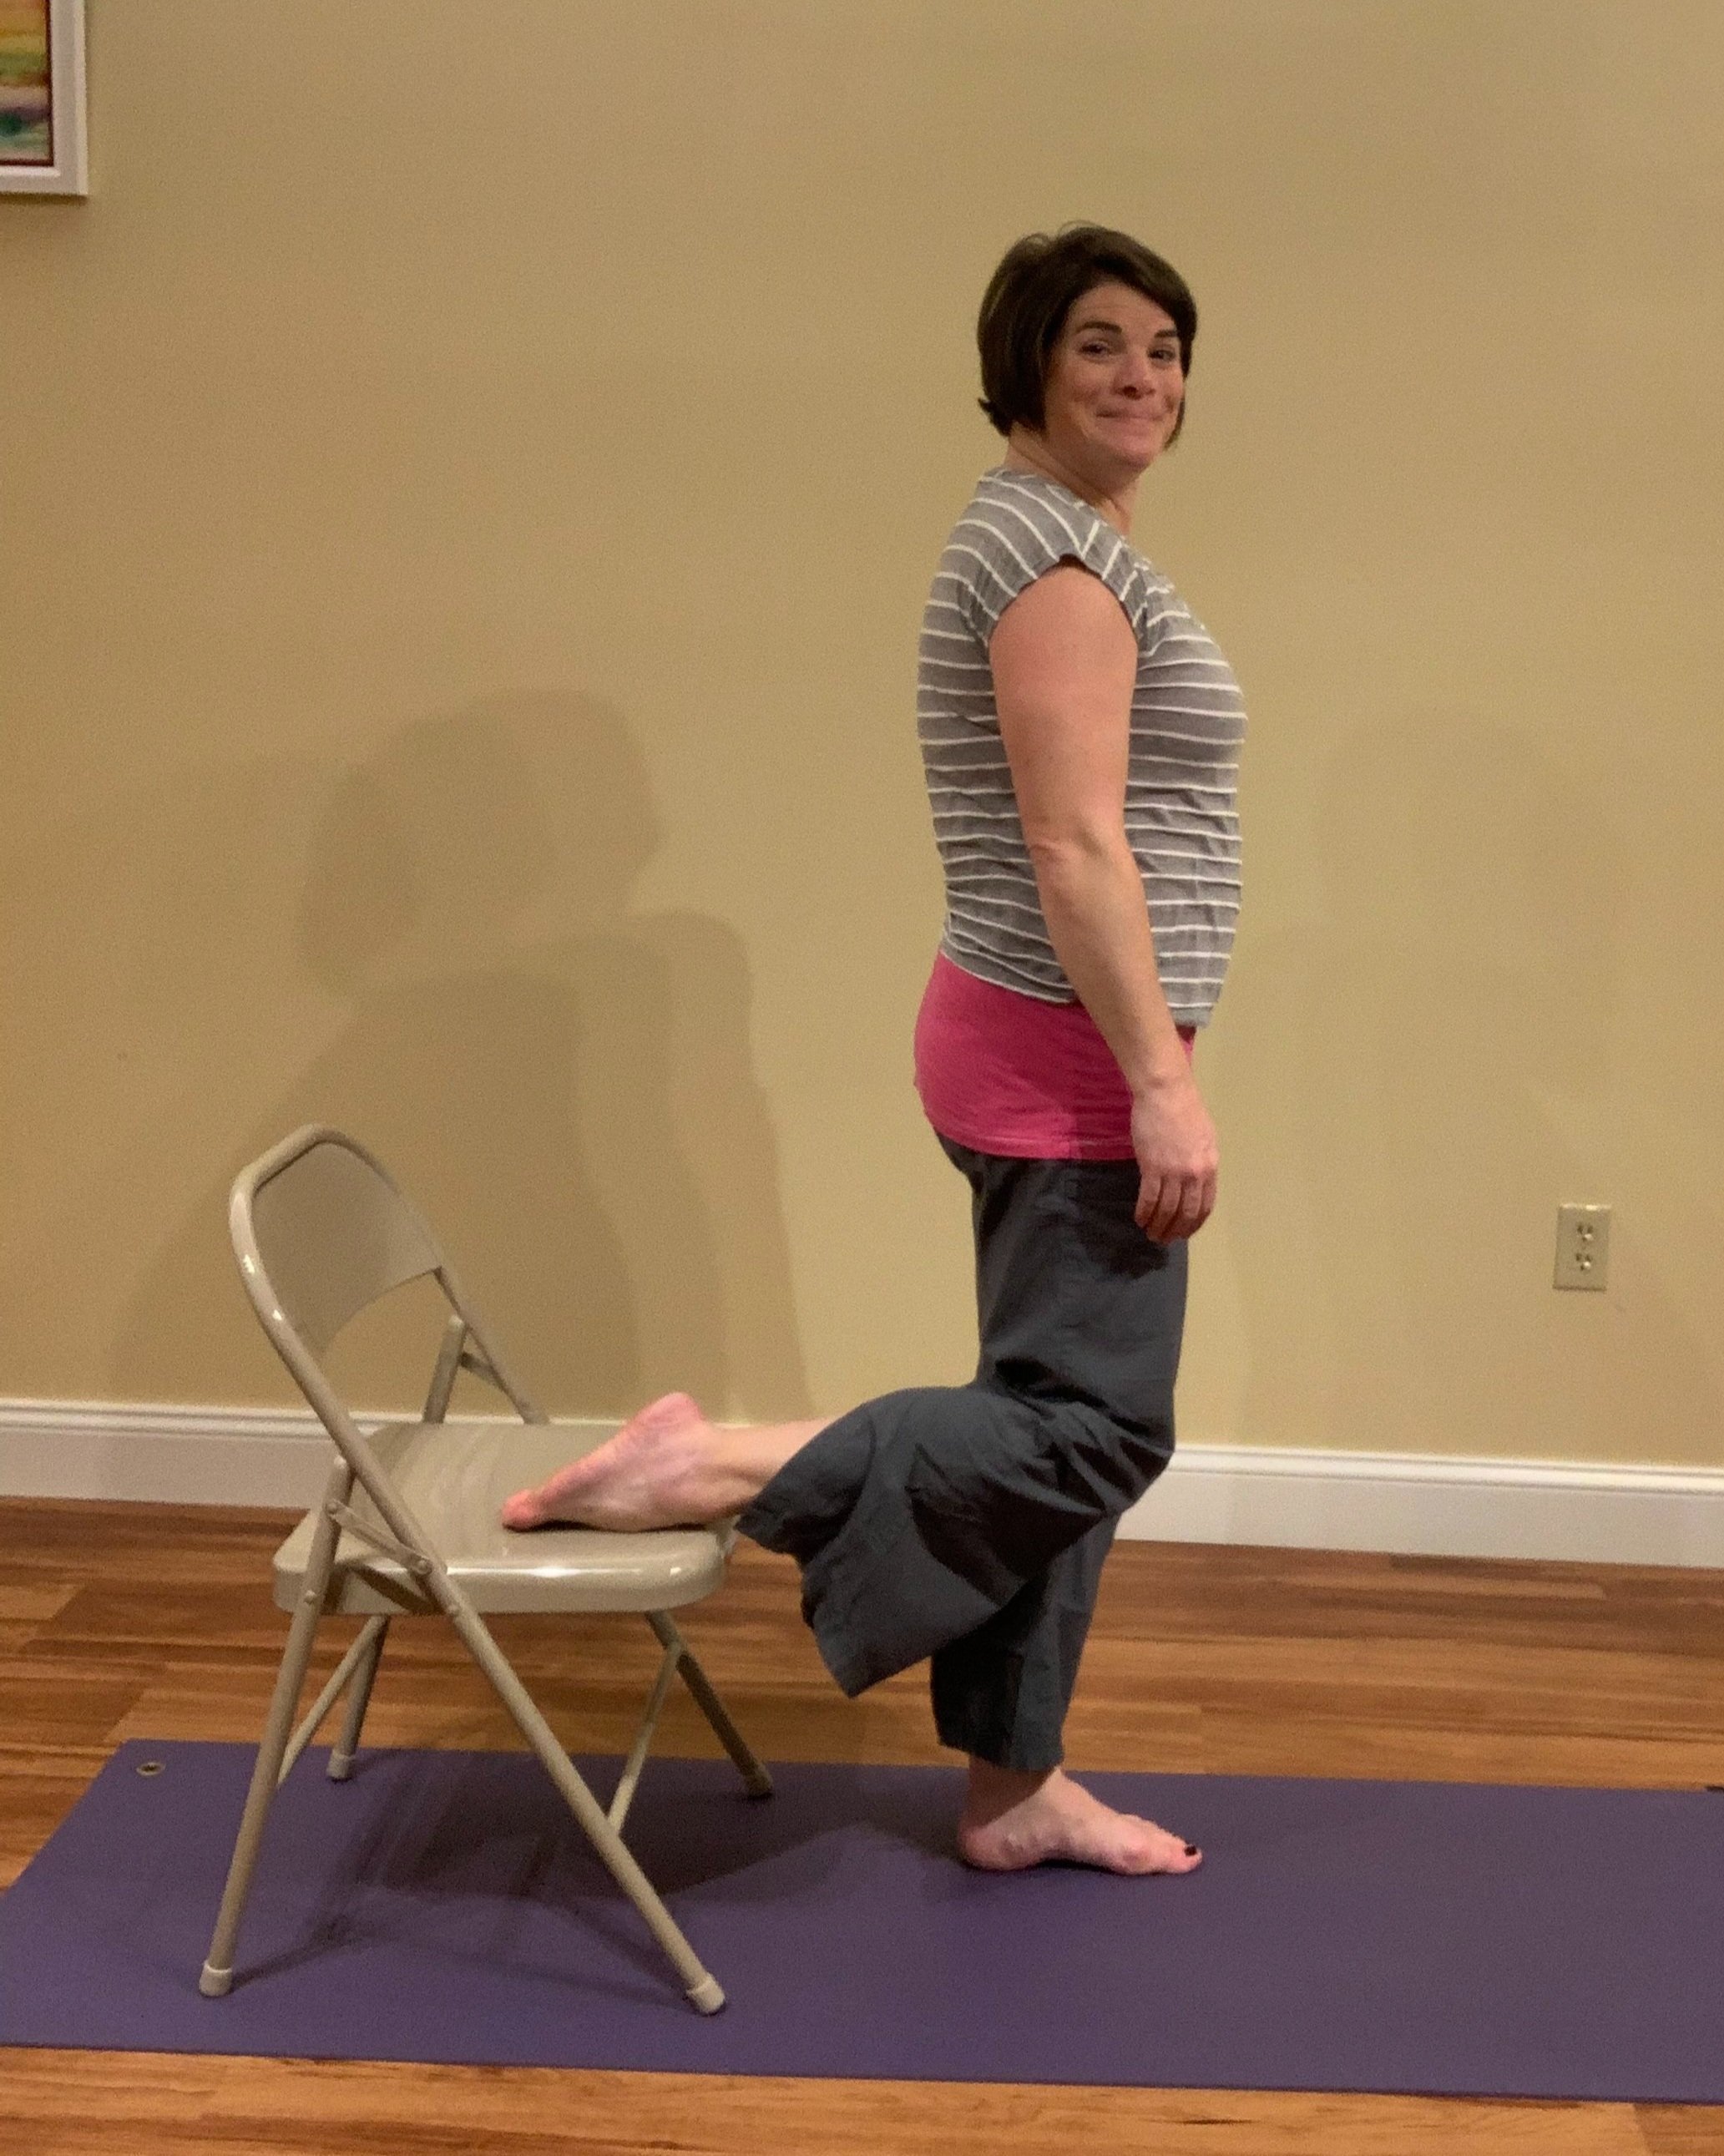
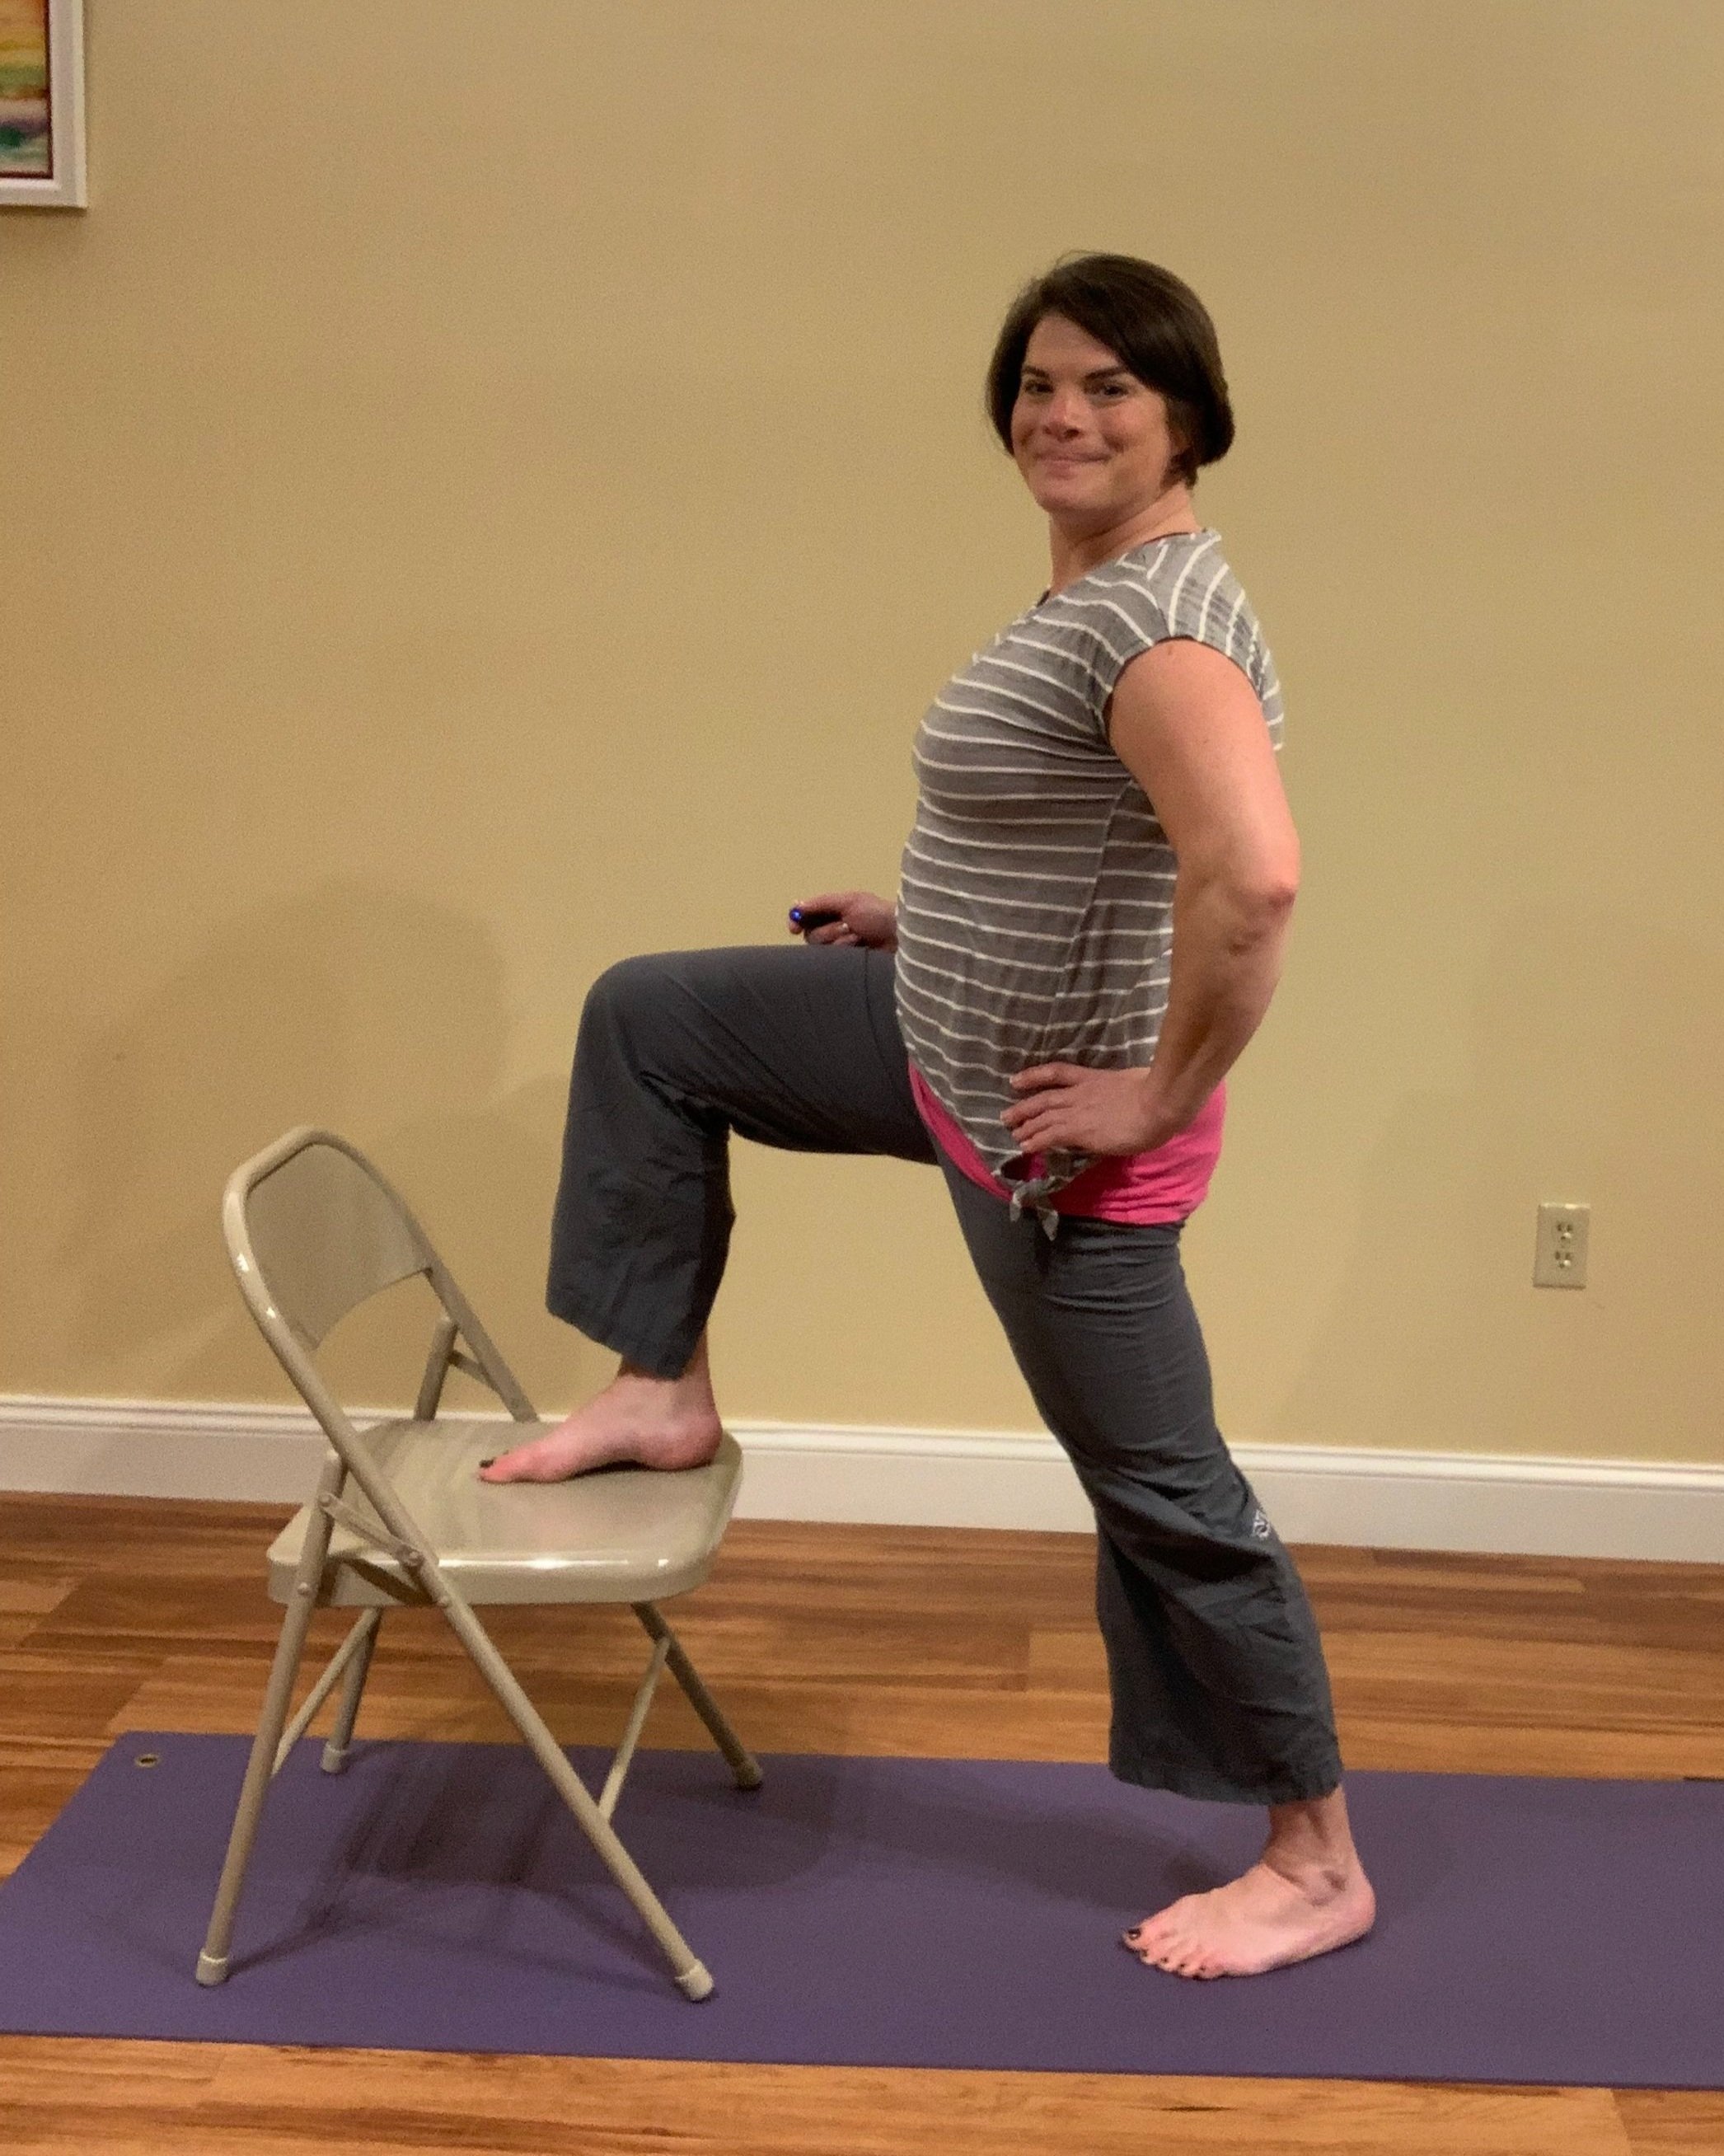
Psoas Stretch:
Place your right foot on a chair and make sure the foot on the floor is behind the body. With a tall spine, lean back a bit until you feel a stretch in the upper thigh of your standing leg. Hold for a minute and repeat on the other side.
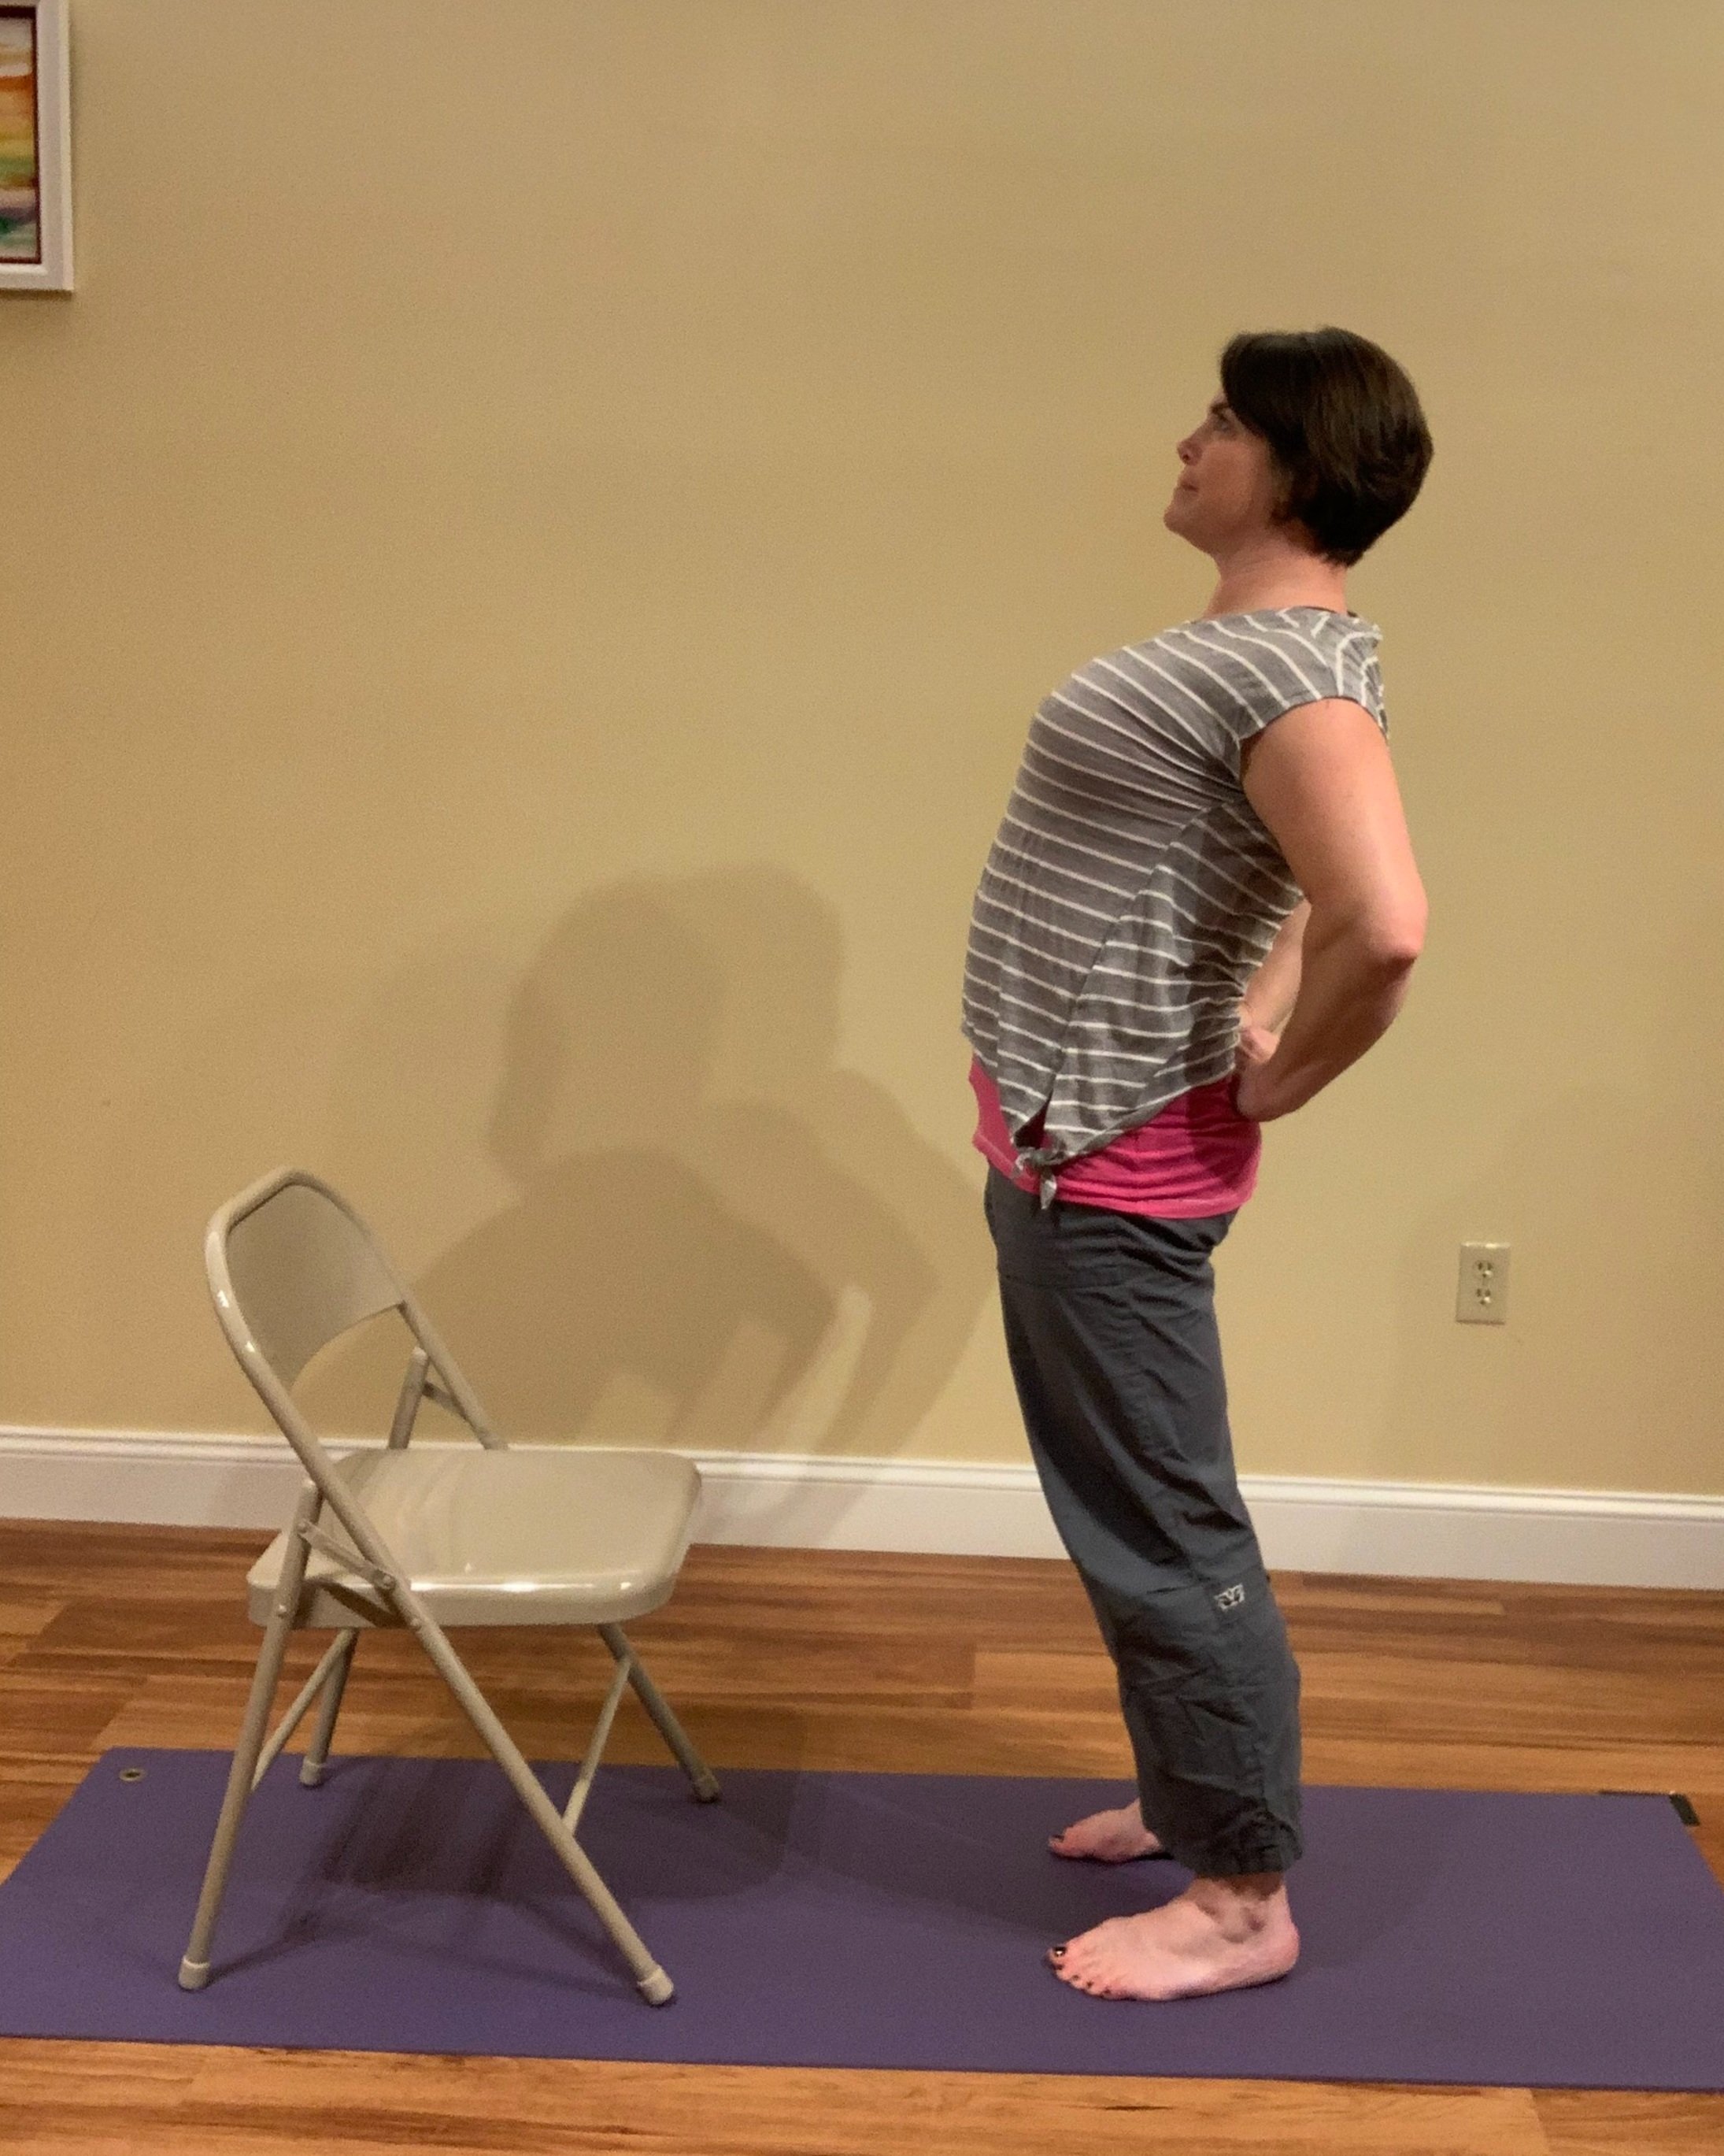
Modification: With your feet hips distance apart, place your hands on your low back and gently press your hips forward.
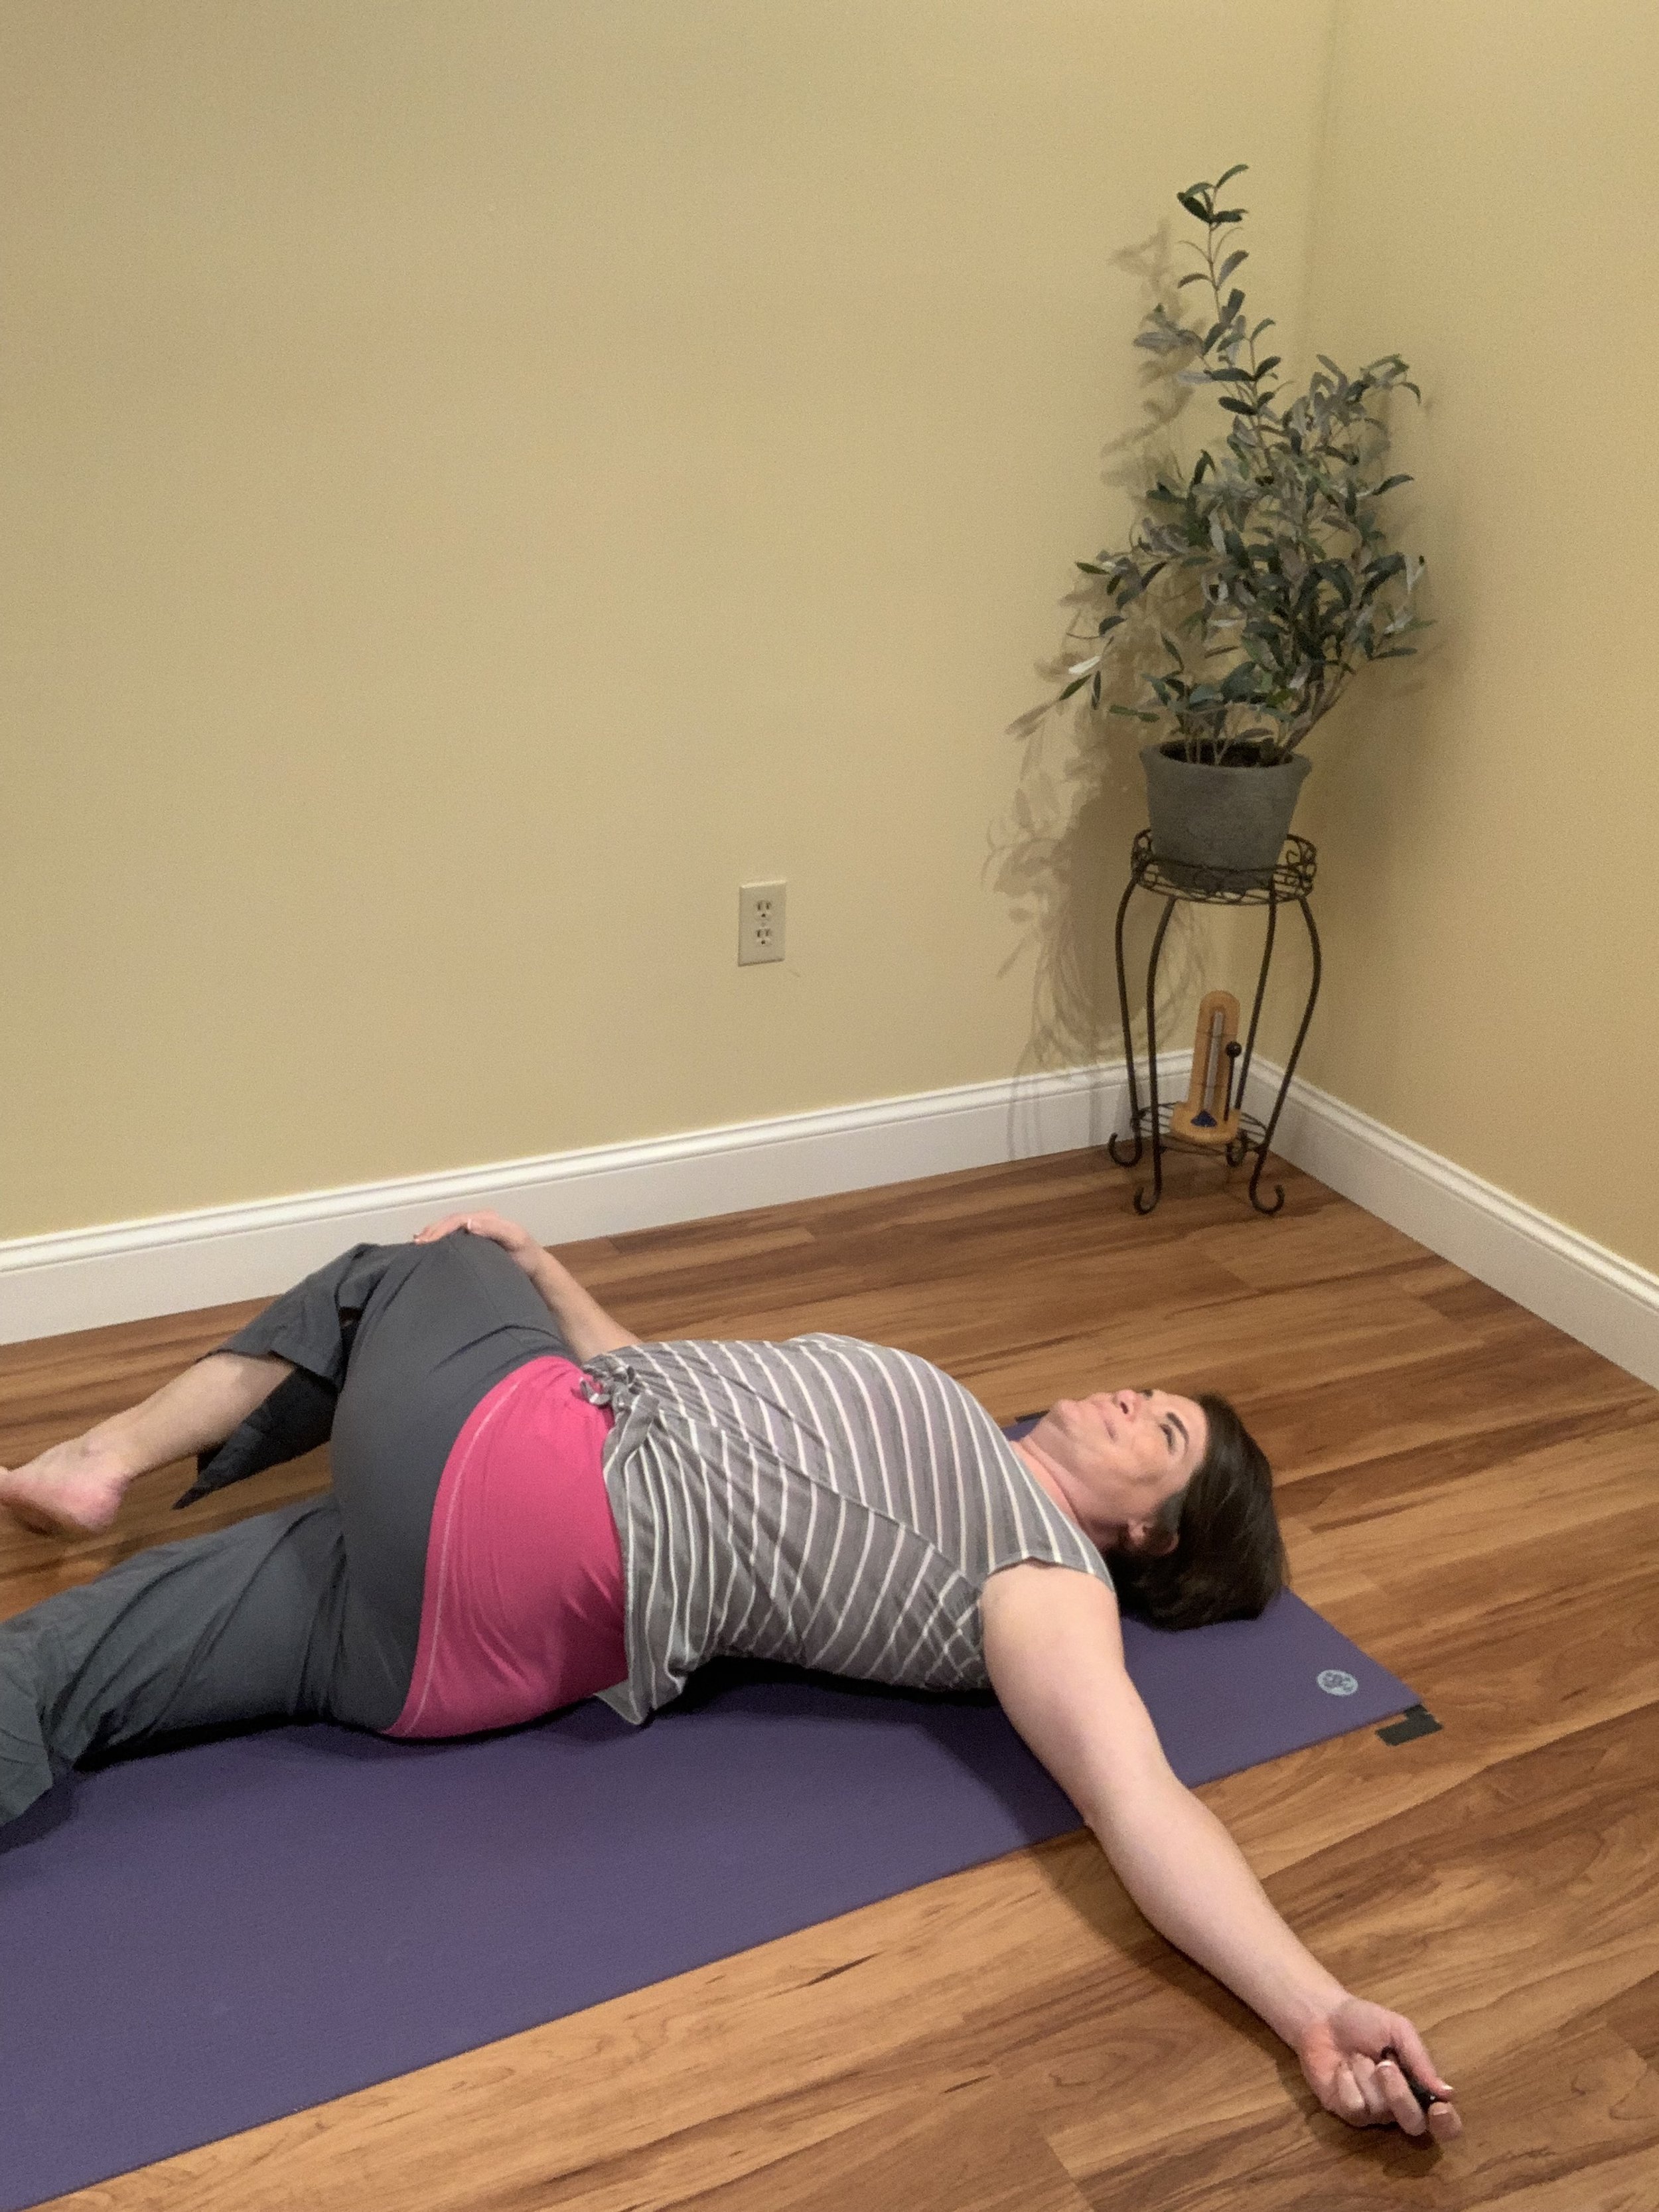
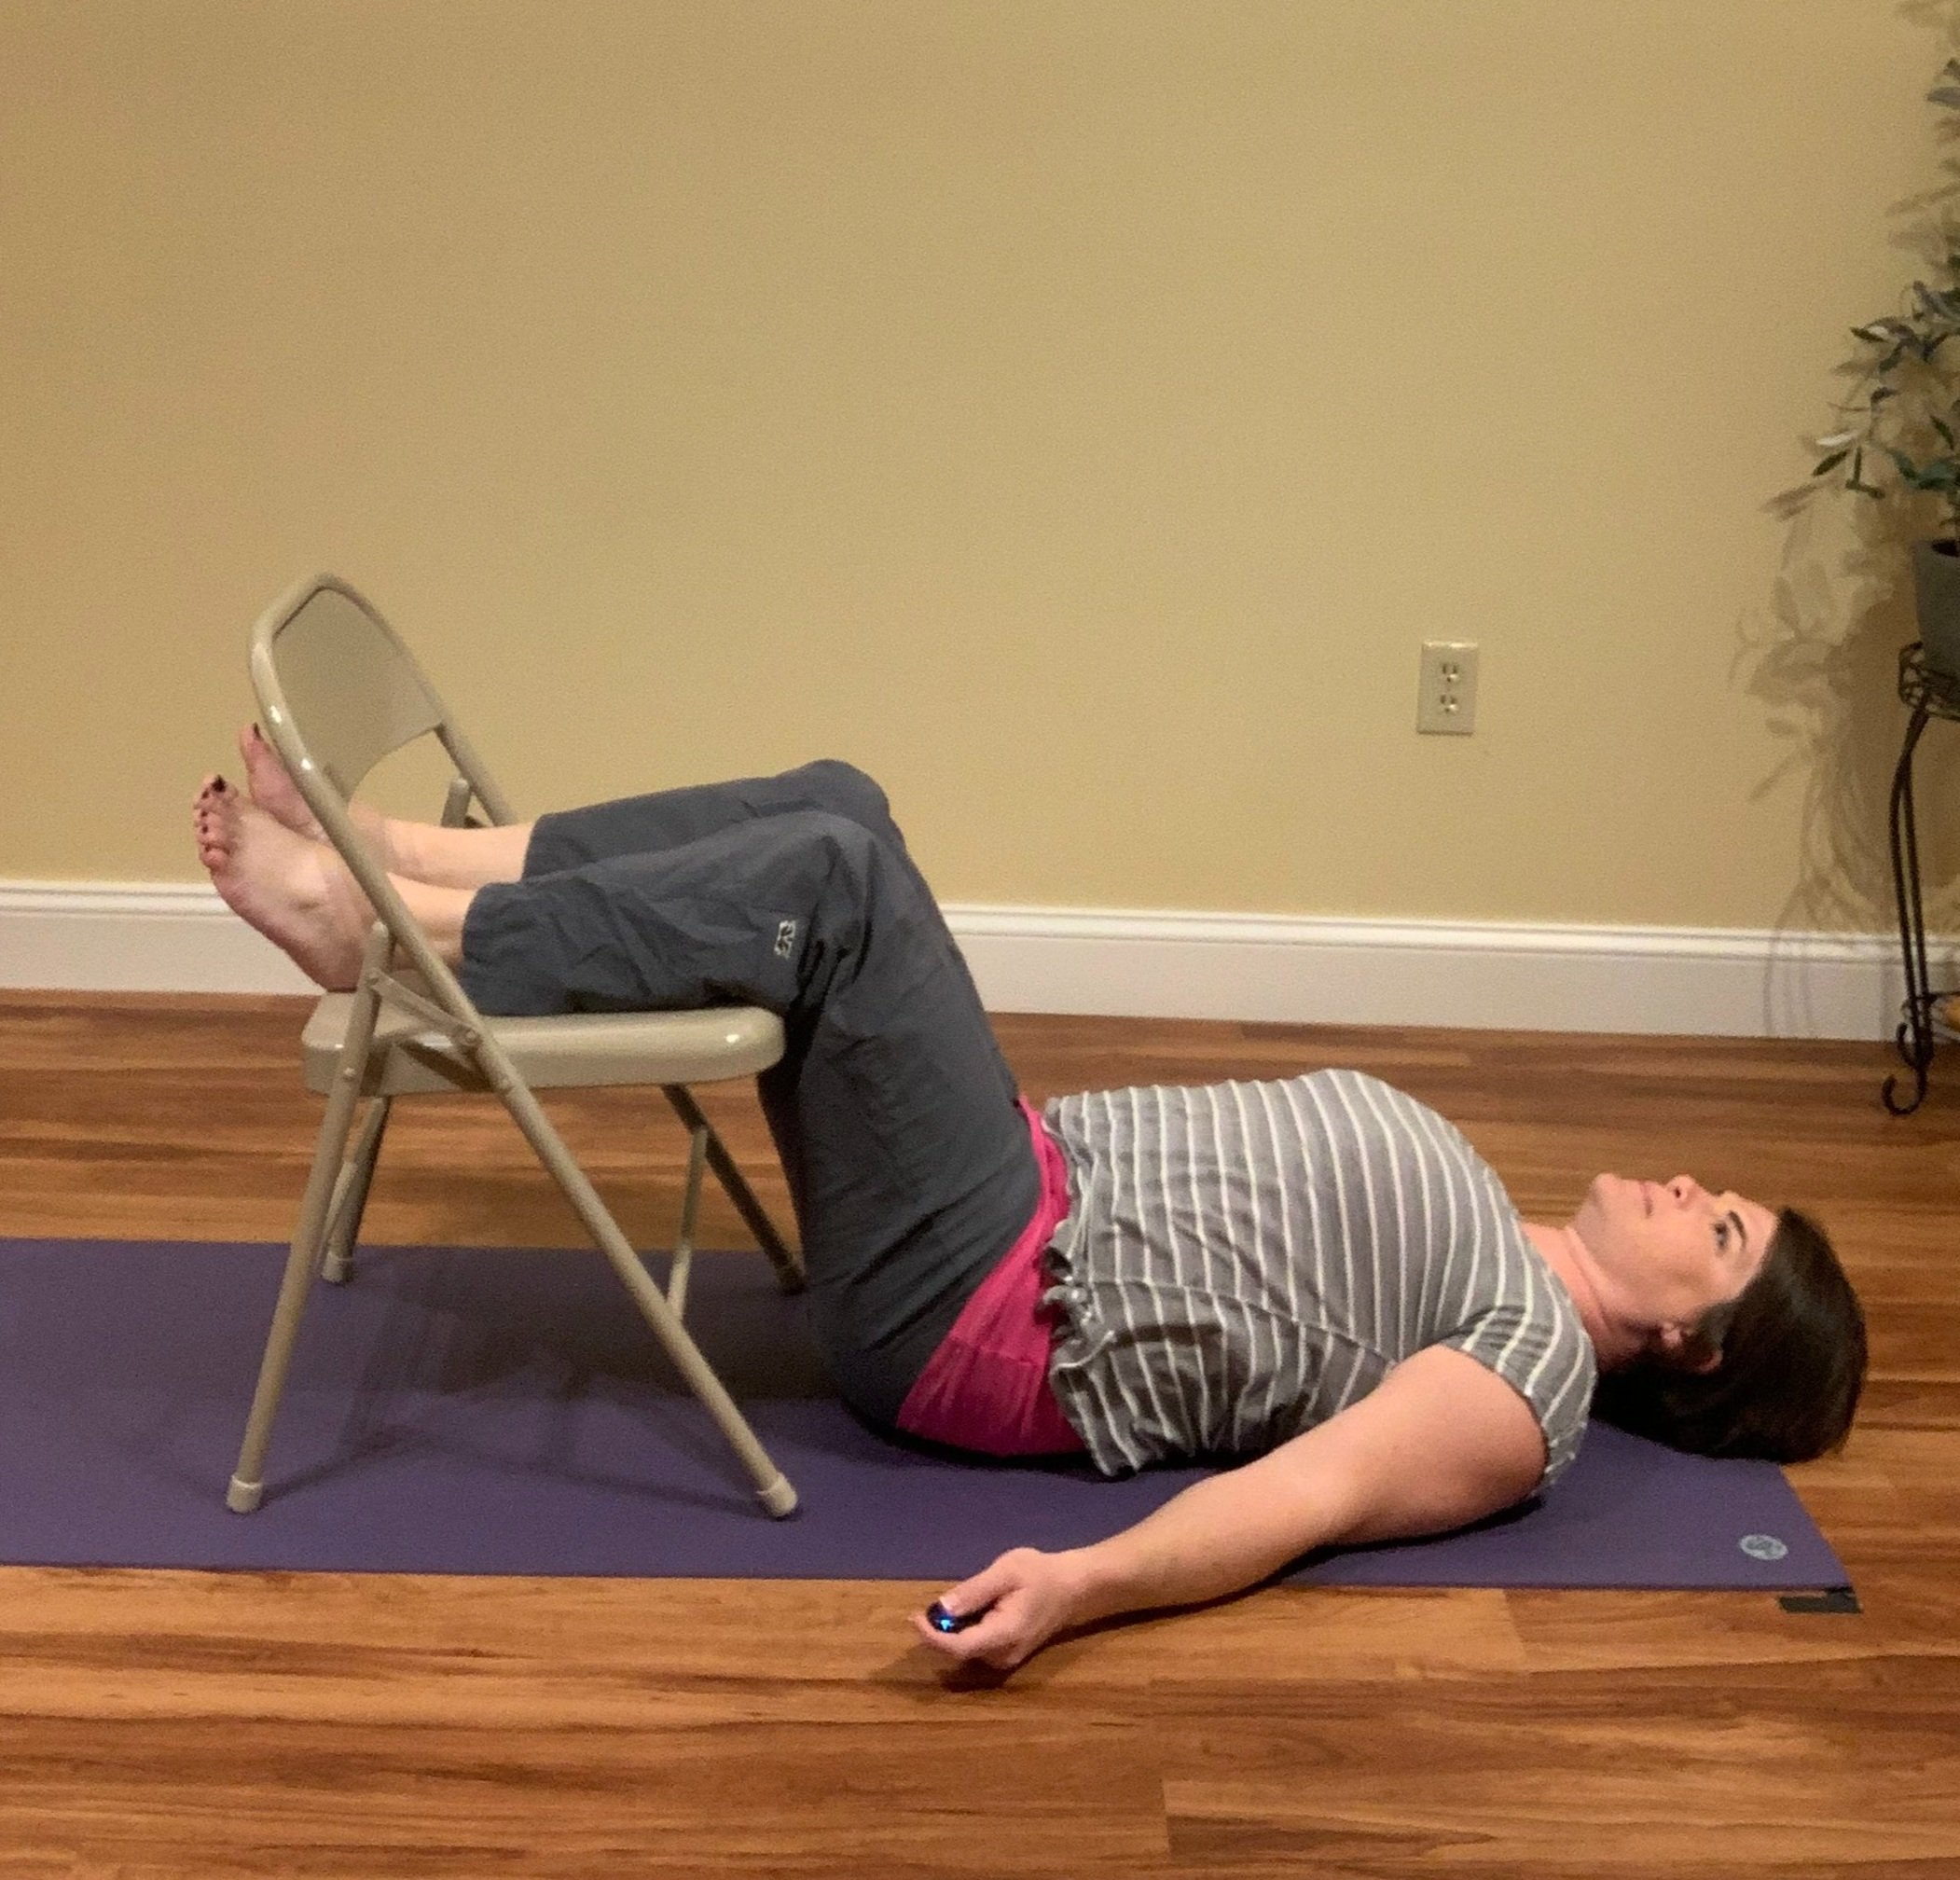
Slacken the Hip Flexors
Lay on your back and place the back of your lower legs on a chair seat or sofa cushion so that the hips and knees are at a 90 degree angle. Relax here for at least two minutes. (This is my favorite go to pose when my low back is tender)
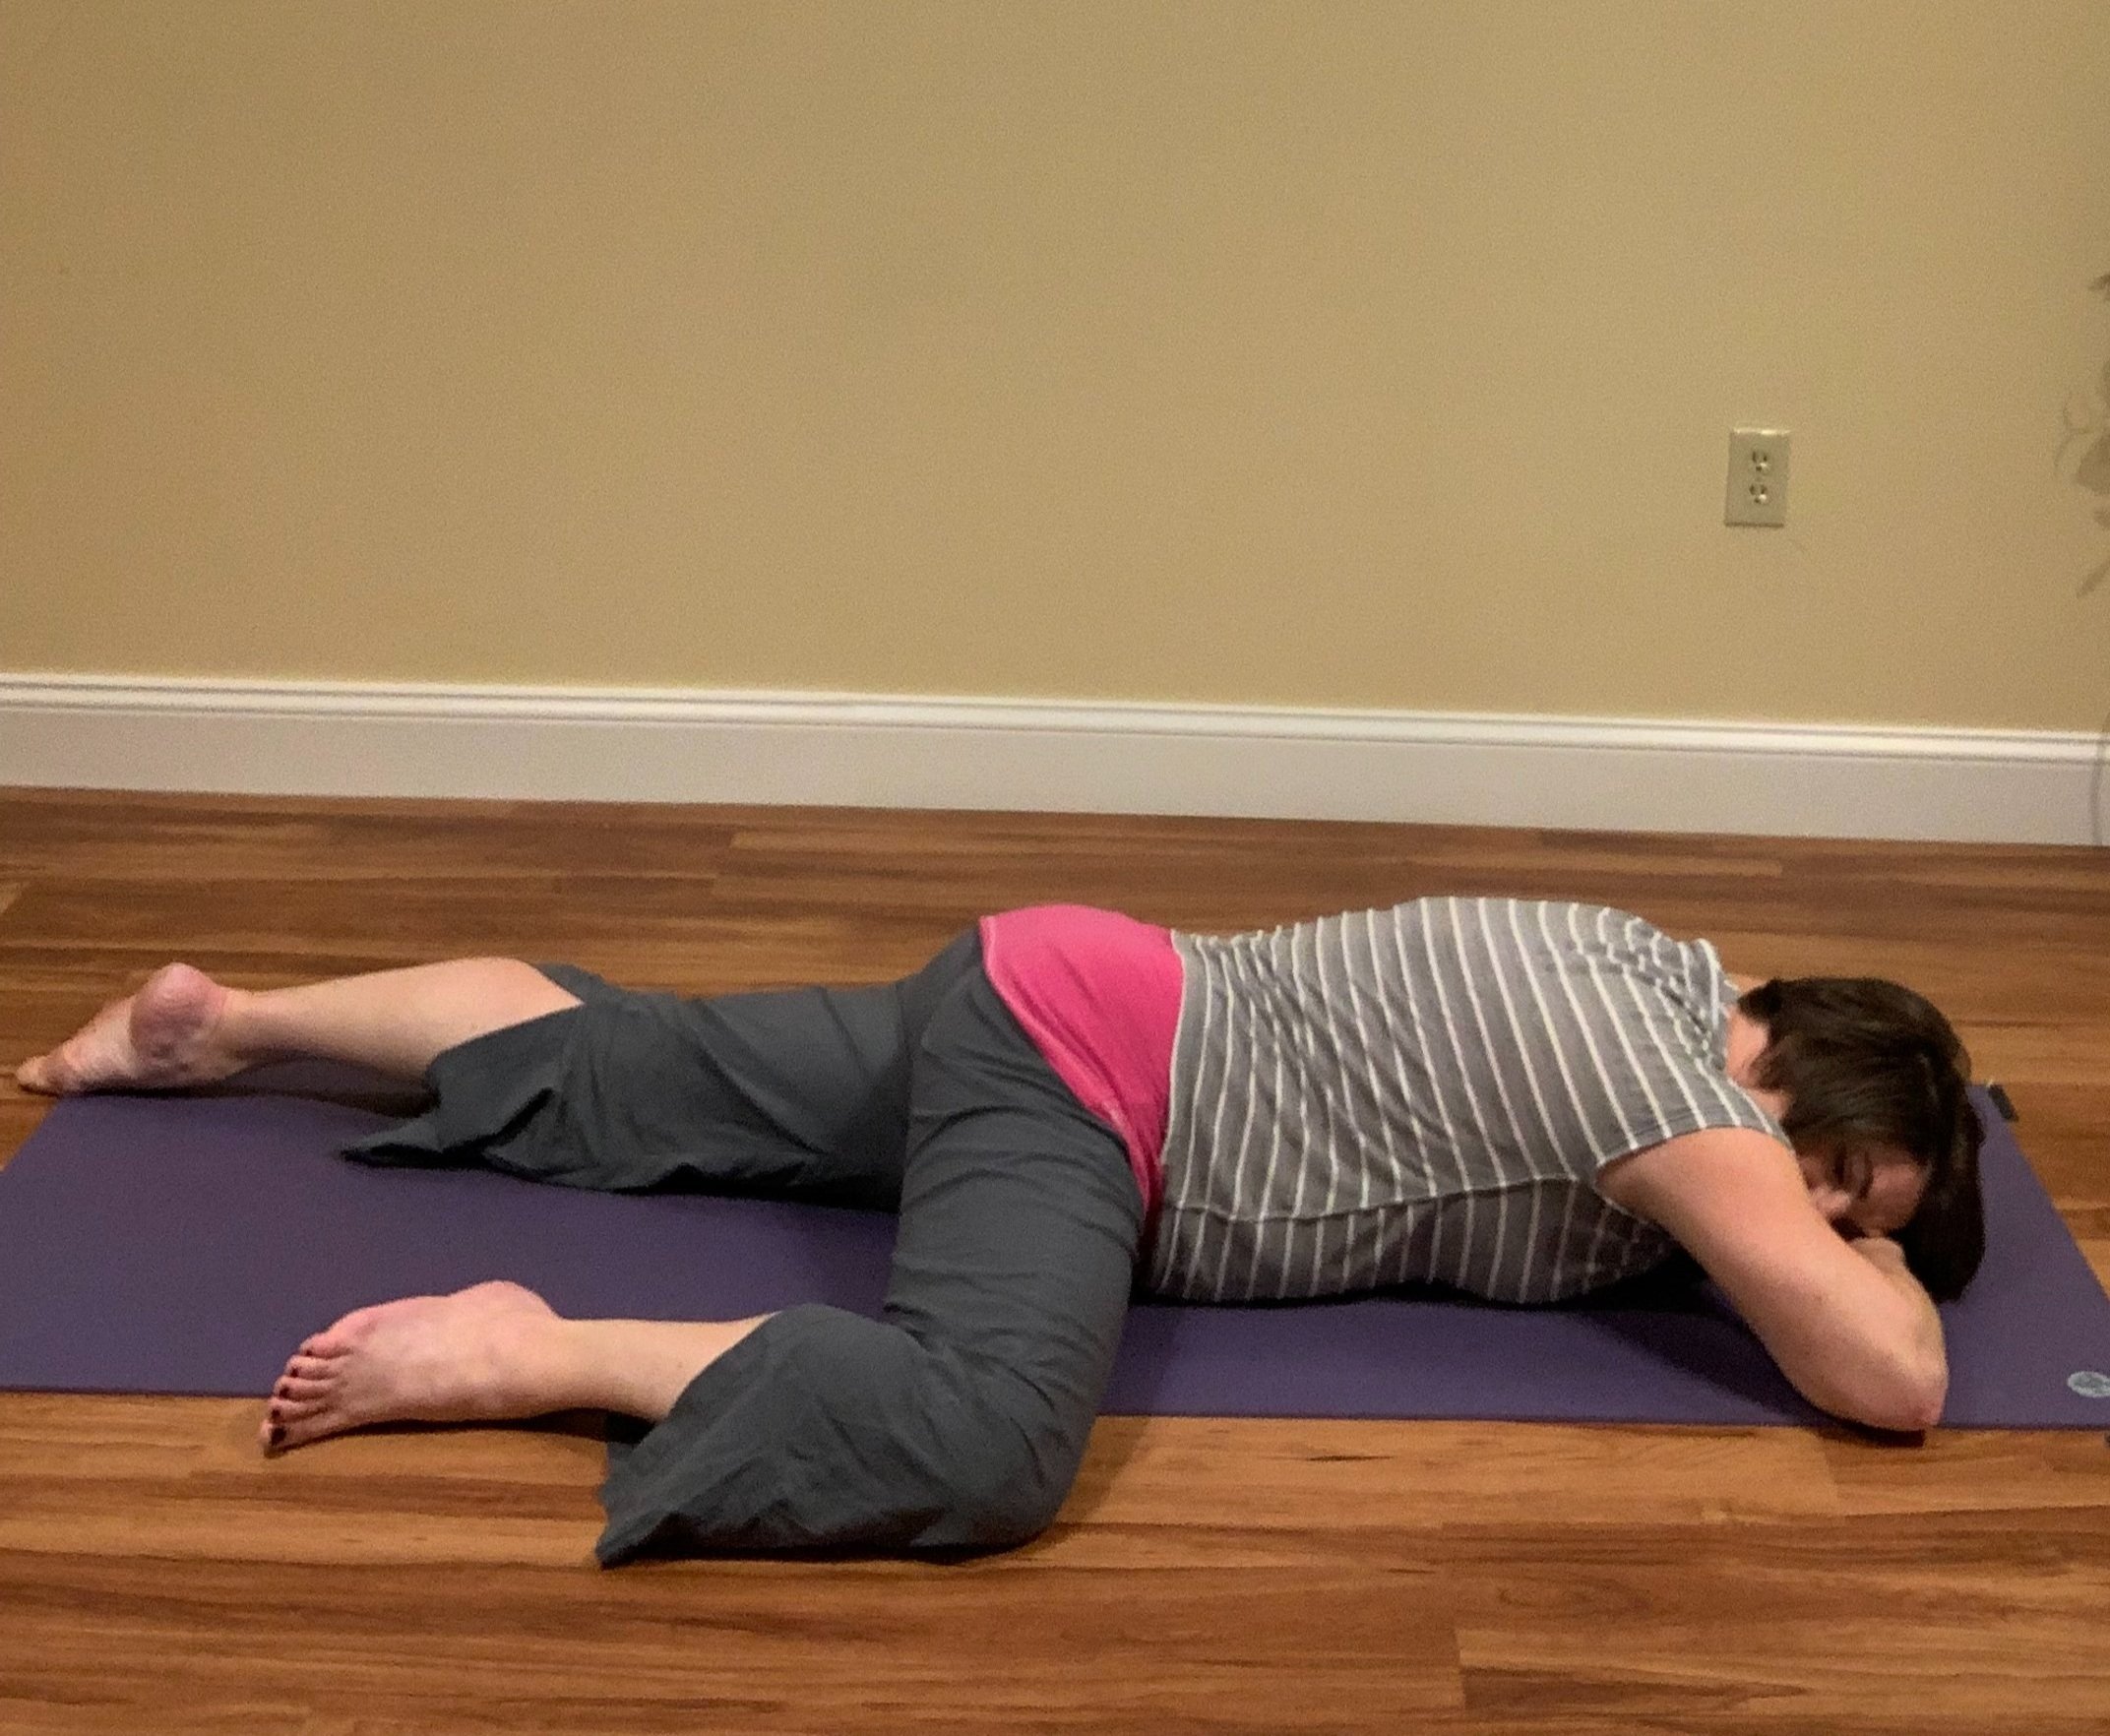
Half Frog Pose:
Lay on your stomach and bend one knee to bring that leg about halfway up along the floor so that the thigh is at a right angle (or a bit less) to your torso. Hold for at least two minutes. This is a great pose to release tension in your lower back. Repeat on the other side.
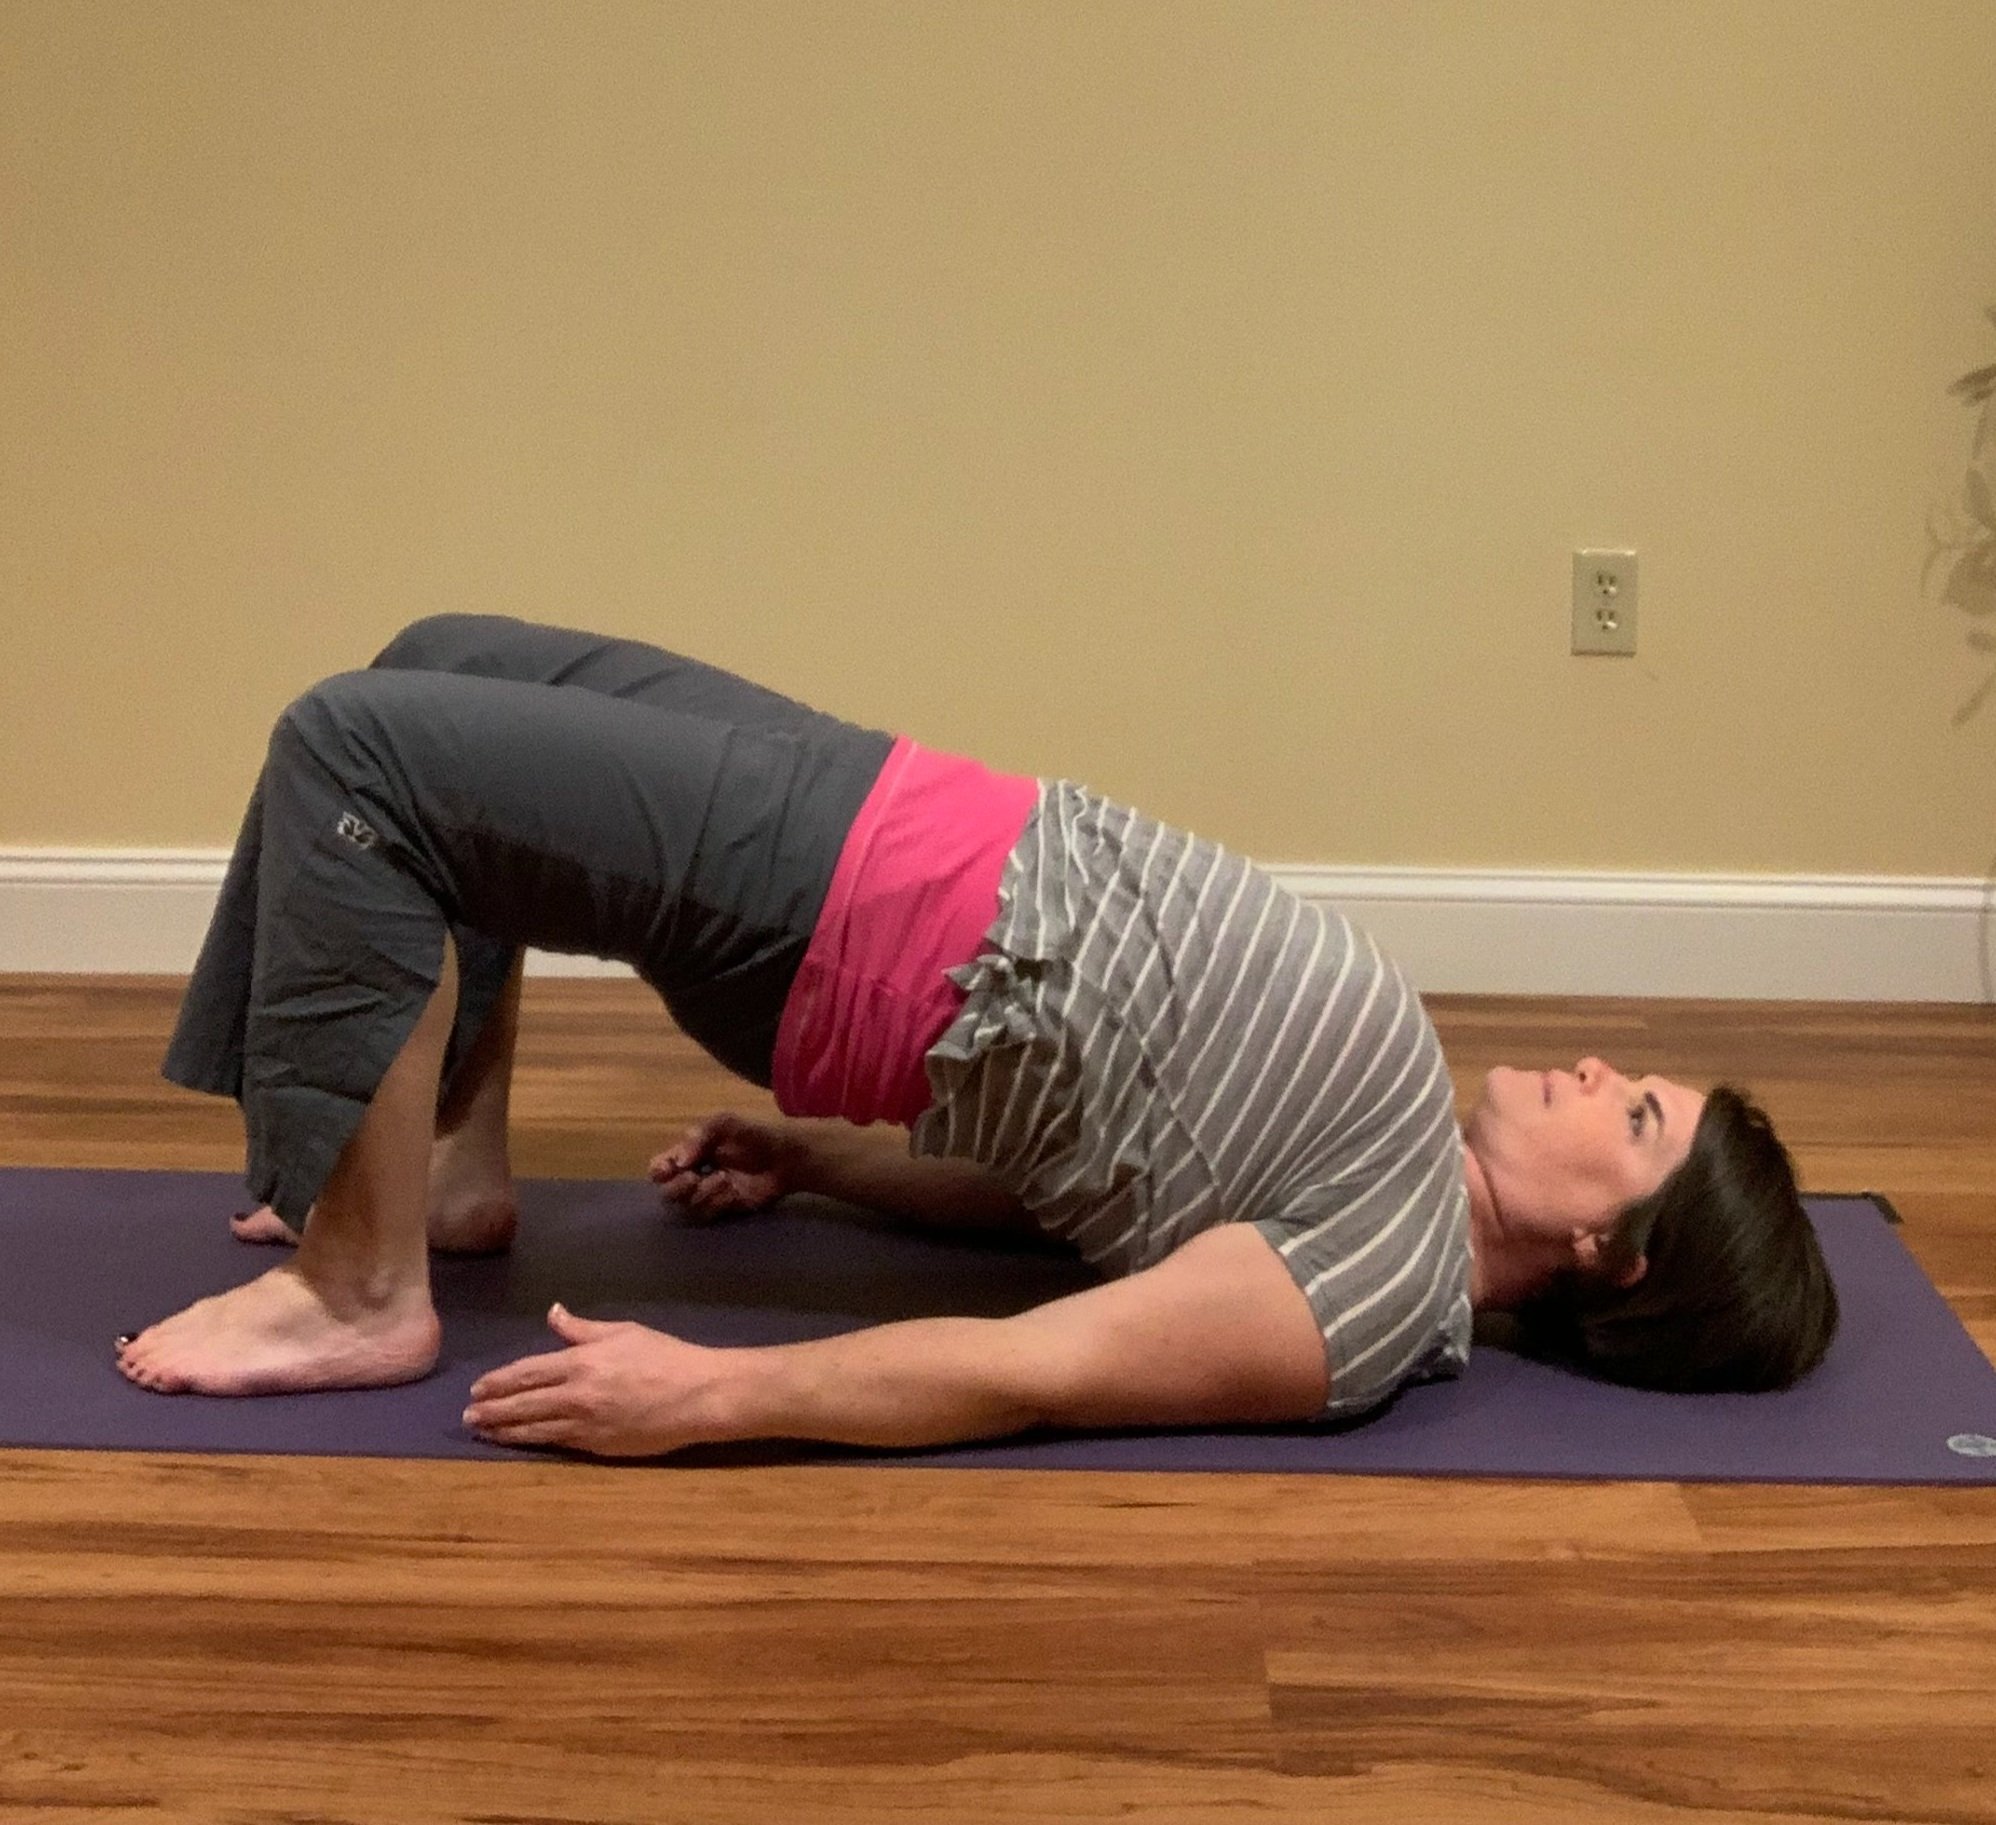
Bridge Pose:
To strengthen the back body, lay on your back and place your feet about hip’s distance apart close to your buttocks. Lift your hips off the floor and either keep your hands by your sides or interlace your fingers under your spine, if you can easily grasp hands without bending the elbows out. You can also add a block or pillow between the legs and squeeze to strengthen the inner thighs while you stay in this pose for 5-10 breaths.
So there you have it! You now know the poses you can do at least 2-3 times a day (or more!) to correct the muscle imbalances that are causing your low back pain! I’m so grateful to the teachings of Lee Albert and his book, Live Pain-Free. If you are interested in learning more about reducing or eliminating chronic pain with Integrated Positional Therapy, you can purchase Live Pain-Free at Serenity Yoga or learn more about Lee at www.leealbert.com.
And if you are new to yoga, or simply want to start a home-practice, check out our FREE 10 Yoga Postures for Beginners Guide! This 5-minute guide is designed to balance out your physical body, reduce stress and improve your overall health.